Category: Pole Barn

  • Which Is Better: Steel Building or Pole Barn?

    Which Is Better: Steel Building or Pole Barn?

    Planning a new barn, shop, or storage space? The big question is steel building or pole barn. Each has clear trade-offs, so the best choice depends on your budget, goals, and how long you need it to last.

    Which is better: steel building or pole barn?

    Steel buildings can last 50+ years with minimal upkeep. Pole barns are cheaper and quicker to build, but usually last 20–30 years before major repairs.

    Key Takeaways

    • Steel Buildings: Stronger, last 50+ years, low maintenance, higher upfront cost.
    • Pole Barns: Cheaper, faster to build, 20–30 year lifespan, more upkeep.
    • Best Choice: Steel if you want long-term durability, pole barn if you need quick, budget-friendly space.

    What Is a Steel Building?

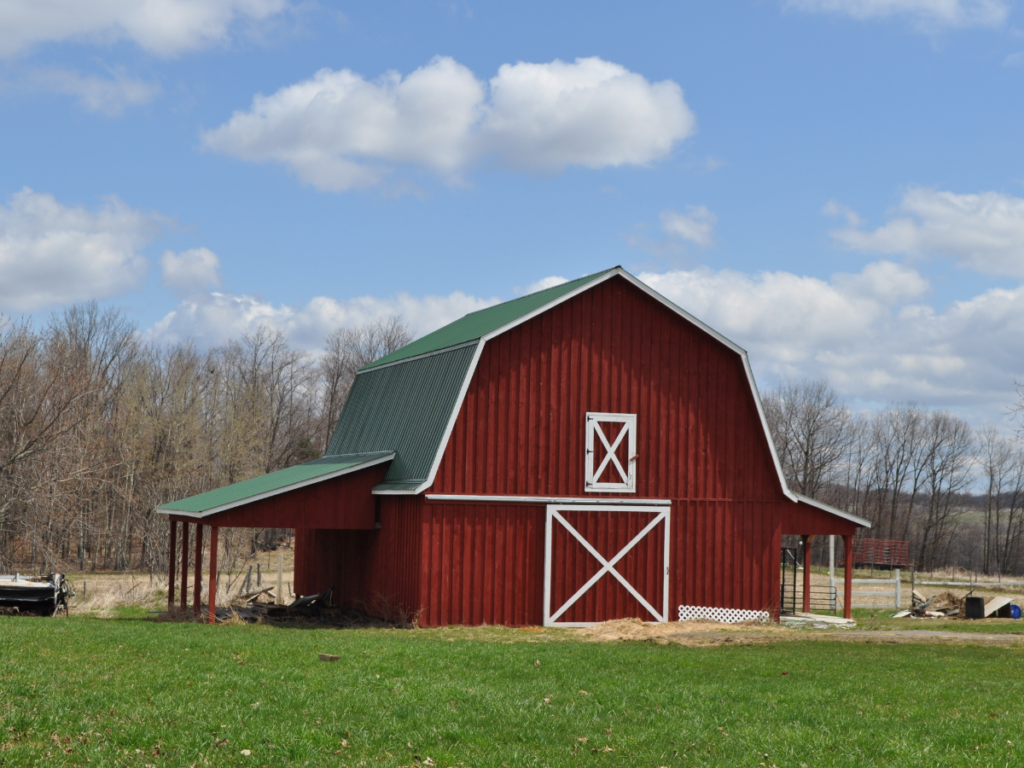
    steel building or pole barn

    Strong Bones, Modern Look

    A steel building is exactly what it sounds like, framed and built with steel. Think clean lines, modern style, and unmatched strength.

    Built for Weather and Wear

    Steel buildings handle storms, snow, and heat without constant patchwork. Instead of frequent repairs, you get a structure designed to endure.

    Space Without Limits

    Because steel carries its own weight, you get wide, open interiors without posts in the way. Ideal for workshops, storage, or even recreational setups.

    Low Maintenance, High Payoff

    Steel won’t rot, warp, or need repainting every year. You spend less on upkeep and more time using your space.

    What Is a Pole Barn?

    The Basics: A pole barn uses posts set deep in the ground for support, often without a traditional concrete foundation. This makes them faster and cheaper to build.

    Why People Choose Them: Pole barns are cost-effective for storage, parking, or workshops. They deliver usable space without stretching your budget.

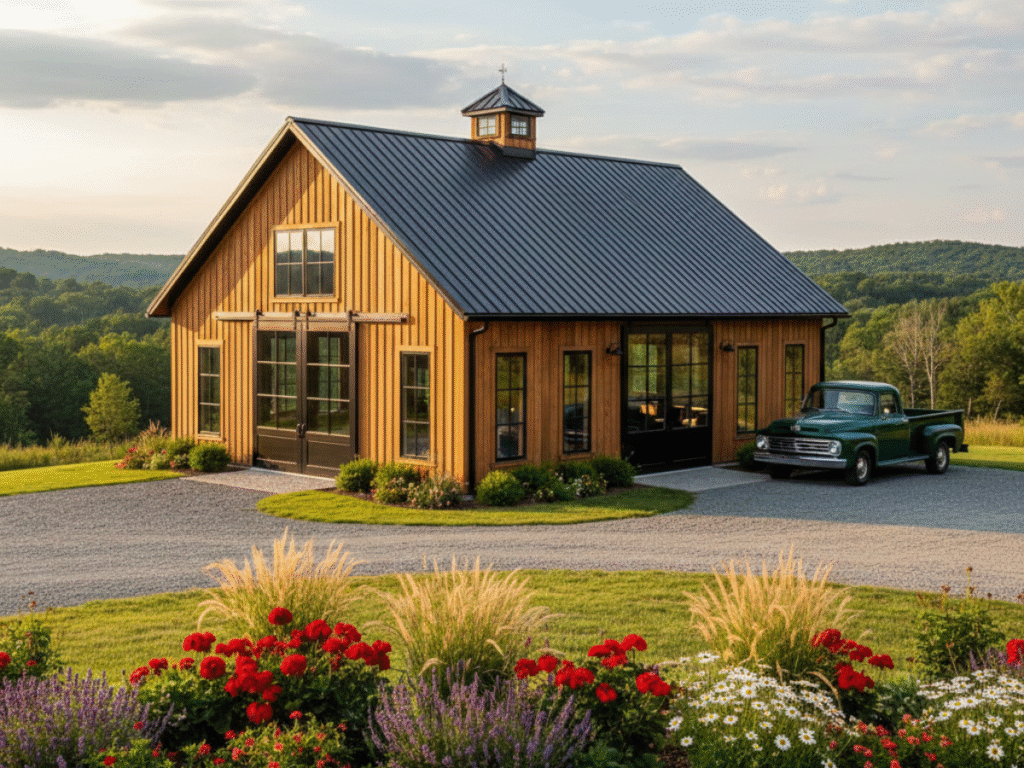
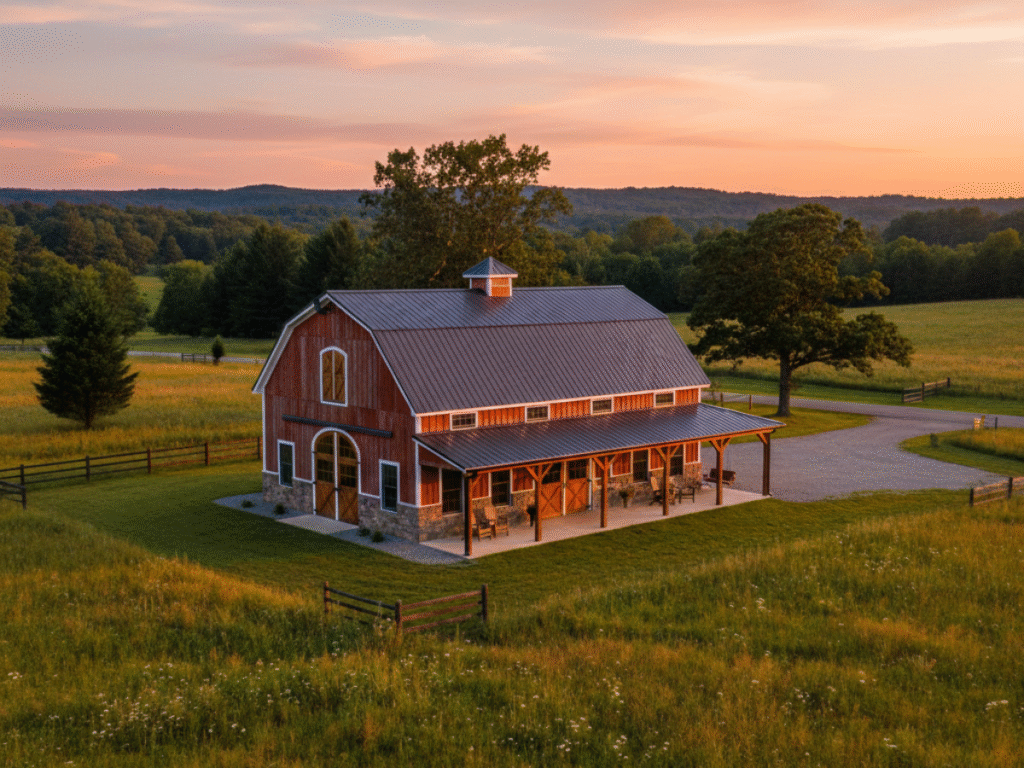
    Style Meets Function: Modern pole barns aren’t just plain sheds. With metal siding, windows, and optional living areas, they balance affordability with function.

    Cost Comparison: Steel Building vs Pole Barn

    Upfront Costs: Pole barns usually cost less upfront thanks to simpler design and materials. Steel buildings require a bigger investment because of heavier framing and construction.

    Long-Term Value: Steel buildings often save more over time. They resist rot, pests, and weather damage, while pole barns usually need more repairs and upkeep.

    Which Fits Your Budget? A pole barn works if you need something quick and affordable. Steel costs more upfront but pays back with decades of durability and fewer repairs.

      Durability and Lifespan

      steel building

      Steel Buildings: Built to Outlast

      Steel is the heavyweight champ here. It resists rot, pests, and warping, which means fewer surprise repairs. With proper upkeep, you’re looking at a structure that can easily push past 50 years.

      Pole Barns: Solid but Shorter Game

      Pole barns hold up well, but wood posts are vulnerable to moisture and termites. Even treated lumber can slowly break down over time. Expect a 20–30-year window before big repairs start calling.

      Which One’s the Smarter Flex?

      If you want a long-term play, steel gives you less drama and more peace of mind. Pole barns are cheaper upfront, but might tap your wallet later. Think of it as choosing between a fast-fashion hoodie and a tailored jacket—the jacket just lasts longer.

      Maintenance Requirements

      Steel Buildings

      Steel buildings are basically low-drama. Wash them down now and then, tighten a bolt if it’s loose, and you’re golden. Rust can show up if you slack, but a quick coat of paint or sealant keeps the shine strong.

      Pole Barns

      Pole barns need a little more TLC. Wood posts can warp, rot, or invite bugs if they’re not protected. Expect to re-treat or replace sections over time, which adds upkeep compared to steel.

      Customisation and Design Options

      Steel Buildings: Sleek and Structured

      Steel buildings give you a clean, modern flex. Think sharp lines, big spans, and almost endless finishes. Perfect if you want your space to look pro without screaming “barn.”

      Pole Barns: Rustic with Wiggle Room

      Pole barns are more laid-back. You can pick siding, roofing, and layouts that lean toward farmhouse or functional. They’re easier to tweak if you want something simple but still personal.

      Which One Fits You?

      If you’re chasing that polished, long-term drip, steel is your play. If budget-friendly with custom charm is more your vibe, pole barns hold their own.

      Energy Efficiency and Insulation

      Steel Buildings: Steel locks in tight. Pair it with insulation and you’ve got a structure that holds heat in winter and stays cooler in summer. That means lower bills and fewer thermostat battles.

      Pole Barns: Pole barns breathe more, which can be good for airflow but not for energy savings. To keep them efficient, you’ll need to add proper insulation, especially if you’re using the space year-round.

      Best Uses for Steel Buildings vs Pole Barns

      Steel Buildings

      Steel flexes as the go-to for big commercial moves, auto shops, and warehouses. You get serious durability, wide spans, and low upkeep. If you’re building for decades of heavy use, steel’s your cheat code.

      Pole Barns

      Pole barns shine for farms, garages, and backyard storage. They’re quick to put up, easier on the budget, and solid for lighter workloads. Perfect if you want space without the luxury price tag.

      Pros and Cons at a Glance

      Steel Building: Pros

      Strong, sleek, and low-maintenance. It laughs at harsh weather and stays sharp for decades. Quick builds mean you’re not living in a construction zone forever.

      Steel Building: Cons

      Upfront cost can sting, and design options lean more industrial. Not the best if you’re chasing farmhouse vibes.

      Pole Barn: Pros

      Budget-friendly and flexible on style. You can flex wood siding, metal panels, or a mix. Great for storage or casual spaces.

      Pole Barn: Cons

      Shorter lifespan and higher upkeep. Wood posts invite rot, pests, and more repair runs over time.

      So, Which Is Better?

      Steel Building

      If you’re playing the long game, steel’s your cheat code. It’s stronger, shrugs off storms, and barely asks for maintenance. Think of it as the Rolex—built tough, timeless flex.

      Pole Barn

      Pole barns win if you’re chasing budget-friendly speed. They’re quick to put up and get the job done without draining your wallet. More backyard BBQ than black-tie gala.

      The Call

      Your move depends on priorities. Need strength and low upkeep? Go steel. Want fast, affordable shelter? Pole barn’s your guy.

    • How to Install Metal Roofing on a Pole Barn

      How to Install Metal Roofing on a Pole Barn

      Installing metal roofing on a pole barn can seem like a big project, but it’s manageable with the right prep. With solid tools and a step-by-step plan, you’ll lock in decades of protection. This guide shows you how to keep your barn strong, dry, and built to last.

      How to install metal roofing on a pole barn?

      To install metal roofing on a pole barn, measure and prep the roof, lay underlayment, install overlapping panels, fasten them securely, add a ridge cap, and seal all edges.

      Key Takeaways

      • Metal roofing offers durability, low maintenance, and energy savings.
      • Gather tools, safety gear, panels, screws, flashing, and ridge caps.
      • Prep the barn by cleaning, checking the frame, and laying underlayment.
      • Install panels starting opposite the wind direction, overlap correctly, and secure with proper screws.
      • Seal edges, add a ridge cap, and inspect for leaks.
      • Maintain by cleaning, tightening screws, and checking after storms.

      Why Choose Metal Roofing for a Pole Barn?

      Metal Roofing for pole barn

      Built to Last

      Metal roofing isn’t just stylish, it’s built like armour. Whether facing rain, snow, or blazing sun, it stands strong without constant repairs. Every sheet adds long-term peace of mind.

      Low Maintenance, Big Payoff

      Forget weekend roof patching. Metal requires far less upkeep than shingles or wood. A quick rinse keeps it looking sharp and performing reliably.

      Energy-Friendly

      Metal reflects heat, keeping your barn cooler in summer. Add insulation and you’ll maintain year-round comfort while cutting energy costs.

      Style That Hits Different

      You don’t need to trade style for strength. Metal roofing comes in colours and finishes that elevate a plain barn into an attractive, modern structure.

      Tools and Materials You’ll Need

      Basic Tools

      You’ll need a sturdy tape measure, chalk line, and reliable power drill. Use snips or a metal-cutting saw for clean, frustration-free panel trimming.

      Safety Gear

      Gloves, goggles, and sturdy boots are essential. Metal sheets are sharp, so always protect your hands and eyes.

      Roofing Materials

      Gather your materials—metal panels, roofing screws with rubber washers, and closure strips. If you’re following a step by step pole barn with metal trusses guide, don’t forget flashing and ridge caps to lock in a watertight, polished finish.

      Pro Tip

      Keep a magnetic sweeper handy. Dropped screws tend to disappear—until your tyre finds them.

      Preparing Your Pole Barn for Metal Roofing

      Clear the Deck

      Before you even think about climbing up, make sure the barn’s roof is clean. Sweep off dust, debris, and any old fasteners that could mess with your panels.

      Check the Frame

      Your roof frame is the backbone. Tighten loose screws, replace warped boards, and confirm trusses are solid. A shaky frame equals shaky roofing.

      Add the Right Base

      Lay down a moisture barrier or underlayment. Think of it like a good pair of socks under fresh sneakers—it keeps things dry and lasts longer.

        Step-by-Step Guide to Installing Metal Roofing on a Pole Barn

        Metal Roofing

        1. Measure and Prep Your Roof

        First things first, grab your tape measure. You’ll need exact dimensions so your metal panels fit clean without awkward gaps. Clear the roof surface of debris, nails, or warped wood. A clean base is the cheat code to a smooth install.

        2. Frame and Add Underlayment

        Install purlins or framing strips if they’re not already there. These are the support crew for your panels. Roll out roofing underlayment to keep moisture in check. Think of it as the invisible bodyguard under your metal roof.

        3. Line Up the First Panel

        Start on the side opposite the wind direction. That way, gusts don’t sneak under your overlaps. Place the first panel flush with the eave and square it to the ridge. If this first piece is crooked, everything else will follow its bad influence.

        4. Fasten with Care

        Use screws designed for metal roofing, and go into the raised ridges of the panel, not the flat spots. Too tight and you’ll dent it, too loose and leaks, crash the party. Keep screws lined up neatly for both strength and aesthetics.

        5. Overlap and Repeat

        Each panel should overlap the one before it by at least one ridge. That overlap is what locks out water. Keep checking that the panels stay square as you move across the roof. Think of it like laying down playing cards—tight, neat, and consistent.

        6. Cut Panels Where Needed

        At ridges, valleys, or roof edges, you’ll likely need to trim panels. Use metal shears or a circular saw with the right blade. Don’t freestyle cuts—clean lines keep your roof looking pro and working right.

        7. Install Ridge Cap

        The ridge cap is the crown jewel. It seals the top where both roof sides meet. Secure it with closure strips to block water, snow, or critters from sneaking in. Once that’s on, your roof’s got its final flex.

        8. Seal the Details

        Check edges, flashing, and screw heads for gaps. Add sealant where panels meet walls or vents. Small details now save big headaches later.

        9. Final Check

        Step back and inspect your work. Panels straight? Screws snug? Seams sealed? If yes, you’ve just installed a metal roof that’ll laugh at storms for decades.

        Common Mistakes to Avoid When Installing Metal Roofing

        Skipping Measurements

        Eyeballing it won’t cut it. Measure twice, cut once, and save yourself a headache later.

        Forgetting Underlayment

        Metal alone isn’t enough. A good underlayment keeps moisture out and extends your roof’s lifespan.

        Using the Wrong Screws

        Wood screws on metal? Bad combo. Always use proper roofing screws with rubber washers for a tight seal.

        Over-Tightening Fasteners

        Cranking screws too hard can warp panels. Snug, not Hulk strength, is the goal.

        Ignoring Flashing

        Skip flashing and leaks will find you. Install it right around edges, vents, and openings.

        Maintenance Tips for Your Pole Barn Roof

        Keep It Clean

        Leaves, sticks, and dirt trap moisture. Sweep or hose it off once in a while so your roof stays drip-free instead of rust-ready.

        Inspect After Storms

        Wind and hail can cause damage. A quick walk-around helps you spot loose panels or screws before they turn into leaks.

        Tighten the Hardware

        Screws loosen over time. Grab a drill, give them a snug twist, and your roof’s grip stays solid.

        Watch for Rust

        If you see a spot, don’t panic. Sand it down, hit it with a sealant, and your barn keeps flexing for years.

        Conclusion & Final Thoughts

        Installing metal roofing on a pole barn takes focus, but it isn’t complicated. Measure carefully, align panels, fasten securely, and seal every detail. Done right, your barn gets strength and style in one. Skip steps, and you invite leaks. Use quality materials, keep it simple, and your roof will stand firm for decades.

      • How to Install a Metal Ceiling in a Pole Barn

        How to Install a Metal Ceiling in a Pole Barn

        Installing a metal ceiling in your pole barn might look tough, but it’s a straightforward project. A finished ceiling adds strength, improves insulation, and creates a clean look. This guide covers the tools, steps, and tricks to install metal ceiling panels smoothly.

        How to install a metal ceiling in a pole barn?

        To install a metal ceiling in a pole barn, measure the space, prepare the framing, add insulation, attach panels, and finish with trim.

        Key Takeaways

        • Metal ceilings add durability, insulation, and a clean finish.
        • Essential steps: measure, prep, insulate, install panels, trim edges.
        • Use safety gear, work with a partner, and maintain regularly.

        Why Install a Metal Ceiling in a Pole Barn?

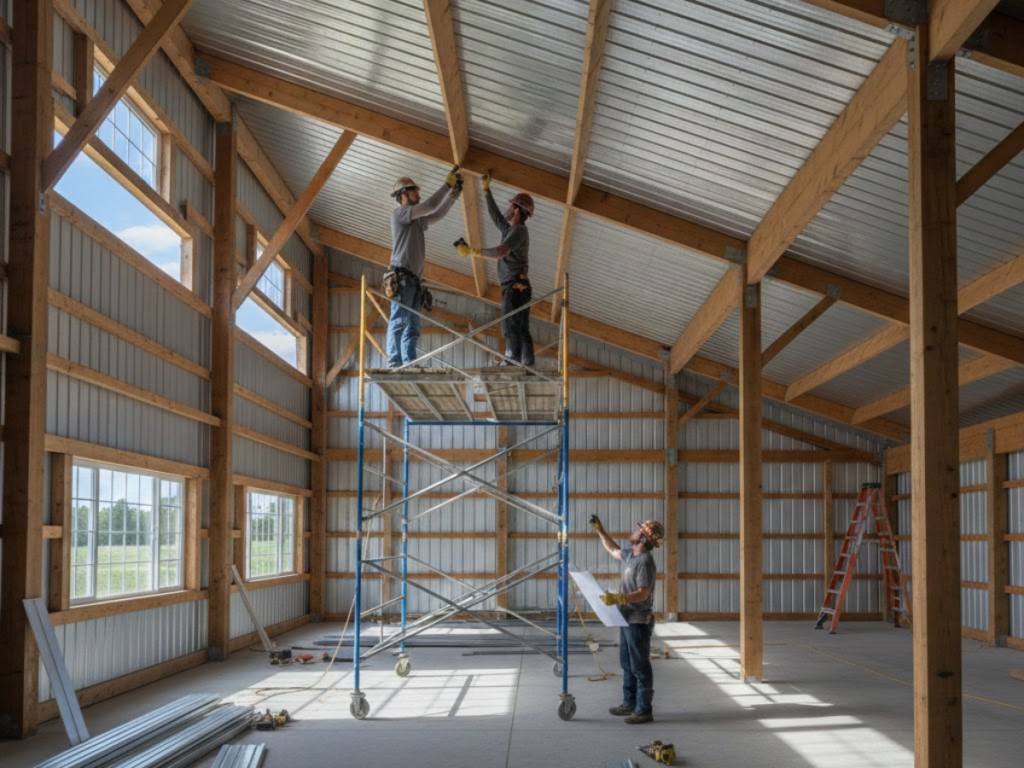
        Metal Ceiling in pole barn

        Keeps Things Cooler (and Warmer)

        Metal ceilings reflect heat in summer and trap warmth in winter. That means you spend less on energy while staying comfortable inside.

        Cleaner Look, Less Hassle

        No one wants to stare at exposed insulation. Metal panels give your barn a sharp, finished vibe that’s easy to wash down with a hose.

        Protects Your Investment

        Dust, pests, and moisture can damage open rafters. A metal ceiling shields your barn interior, keeping tools, equipment, and livestock safe.

        Long-Term Flex

        Wood sags and warps. Metal stays tight. Install it once, and you’re set for decades with almost no upkeep.

        Tools and Materials You’ll Need

        Measuring & Marking

        Grab a tape measure and chalk line. Accuracy here saves you from crooked panels and extra headaches later.

        Cutting & Fastening

        You’ll want tin snips or a metal saw for clean cuts. A drill with self-tapping screws is your cheat code for fastening panels tightly and fast.

        Safety Gear

        Gloves, safety glasses, and a sturdy ladder are non-negotiable. Protect yourself properly before lifting heavy panels overhead.

        Panels & Supports

        Metal ceiling panels, furring strips, and fasteners make up the core kit. Think of them as the tux and cufflinks of your barn ceiling.

        Step 1: Plan and Measure Your Ceiling Space

        Get the Big Picture

        Before you start lifting panels, map out your ceiling space. Grab a notebook, sketch the layout, and think about lights, fans, or vents you’ll need to cut around.

        Measure Twice, Regret Never

        Use a tape measure to grab the length and width of the barn. Then double-check it. A few extra minutes here saves you from panels that don’t line up later.

        Spot the Sneaky Obstacles

        Look for beams, trusses, or other obstacles that could disrupt panel placement. Planning around them now saves time and frustration later.

          Step 2: Prepare the Pole Barn for Installation

          Metal Ceiling

          Clear the Space

          First things first, clean out the barn. Move tools, tractors, or anything that’ll get in the way. A clear space means fewer headaches when lifting panels.

          Check the Structure

          Give the framing a quick inspection. Tighten loose screws, replace warped boards, and make sure posts are solid. Your ceiling only looks good if the bones are solid.

          Add Backing Where Needed

          If you’ve got wide gaps between trusses, add 2x4s or furring strips. This gives the metal ceiling panels something firm to grab onto, keeping the install smooth and steady.

          Step 3: Add Insulation (Optional but Recommended)

          Why Insulation Helps

          Think of insulation as your barn’s hoodie. It keeps the heat in during winter and blocks the summer scorch. You’ll save on energy and cut down on sweaty afternoons.

          Choosing the Right Material

          Foam boards offer efficiency with minimal effort, while fiberglass is budget-friendly but needs careful handling. Choose based on budget and performance needs.

          Fiberglass is more budget-friendly but needs extra care when installing. Pick what matches your barn’s drip and your wallet.

          Quick Install Tips

          Slide insulation between trusses before the ceiling panels go up. Seal any gaps so air doesn’t sneak through. It’s the cheat code for comfort and efficiency.

          Step 4: Install the Metal Ceiling Panels

          Start at One Corner

          Kick things off in a corner and keep the first panel straight. This first piece is your anchor, so get it right. If it’s off, the rest will look like a crooked smile.

          Line Up and Lock In

          Slide each new panel into place, making sure seams overlap tightly. Use self-tapping screws through the raised ribs, not the flat spots. That way, the panels flex less and stay snug.

          Keep It Tight, Not Overkill

          Screws should be snug but not over-tightened. Too much pressure can warp the panels and ruin the finish. Too much pressure warps the panel and look messy. Think firm handshake, not bone-crusher.

          Work Your Way Across

          Move steadily across the ceiling, panel by panel. Keep checking alignment as you go so you don’t end up fighting gaps at the far wall. A chalk line or laser makes you look pro, even if it’s your first time.

          Finishing Touch

          Once all panels are up, add trim where the ceiling meets the walls. It cleans up the edges and makes the whole barn feel dialed in instead of half-done.

          Step 5: Trim and Finish Edges

          Cut Clean Lines

          Once the panels are up, it’s time to handle the edges. Use tin snips or a metal saw for sharp, straight cuts. Clean lines give your ceiling that pro look.

          Add Trim for Style

          Edge trim isn’t just cosmetic; it hides gaps and locks panels tight. Snap it in place around corners and ends for a neat finish.

          Seal It Up

          If you’re aiming for max durability, add a bead of sealant where trim meets panel. Keeps dust out and the ceiling drip-free.

          Safety Tips During Installation

          Gear Up First

          Gloves, goggles, and a sturdy ladder aren’t optional. They’re your starting lineup. Protect your hands, eyes, and balance before you even lift a panel.

          Watch Your Head

          Metal sheets can be sharp and heavy. Metal panels are sharp and heavy. Wear protective gear and stay cautious when lifting them overhead.

          Secure the Ladder

          Set your ladder on solid ground. Wobble while holding steel overhead, and it’s game over.

          Don’t Solo It

          Grab a buddy. One holds, one fastens. Twice the speed, half the sketchy moments.

          Maintenance Tips for Your Metal Ceiling

          Keep It Clean

          Dust and cobwebs love open beams. A quick sweep with a soft broom or a shop vac keeps the ceiling sharp.

          Watch for Moisture

          If you notice condensation, check ventilation immediately to prevent moisture damage to your ceiling. Check ventilation before water messes with your finish.

          Tighten Loose Screws

          Metal shifts with temperature. Every few months, give fasteners a quick once-over to keep things snug.

          Spot Problems Early

          Rust or scratches? Touch them up fast. A little attention now saves you from pricey fixes later.

          Conclusion

          Installing a metal ceiling in your pole barn is a straightforward project with the right prep, tools, and steady work. Once complete, you’ll enjoy a clean, durable, low-maintenance ceiling for years.

          Once the panels are locked in, you’ve got a ceiling that flexes style and function. Clean look, long life, and way less hassle than wood.

          So grab your gear, line it up right, and let that barn shine like it should.

        • How to Build a Pole Barn with Metal Trusses

          How to Build a Pole Barn with Metal Trusses

          Building a pole barn is simpler than most people think, especially with metal trusses. They reduce labour, increase durability, and lower lifetime costs. This guide walks you through each step to build a sturdy, practical barn that lasts.

          How to Build a Pole Barn with Metal Trusses?

          Mark out the site, set treated posts to code, fit engineered trusses, add purlins and wall girts, then install roof and wall panels, frame openings, seal trims, and inspect.

          Key Takeaways

          Metal trusses deliver strength, speed, and clean spans. Plan carefully, use quality materials, and build to code for a barn that lasts decades with minimal maintenance.

          Why Choose Metal Trusses for Your Pole Barn?

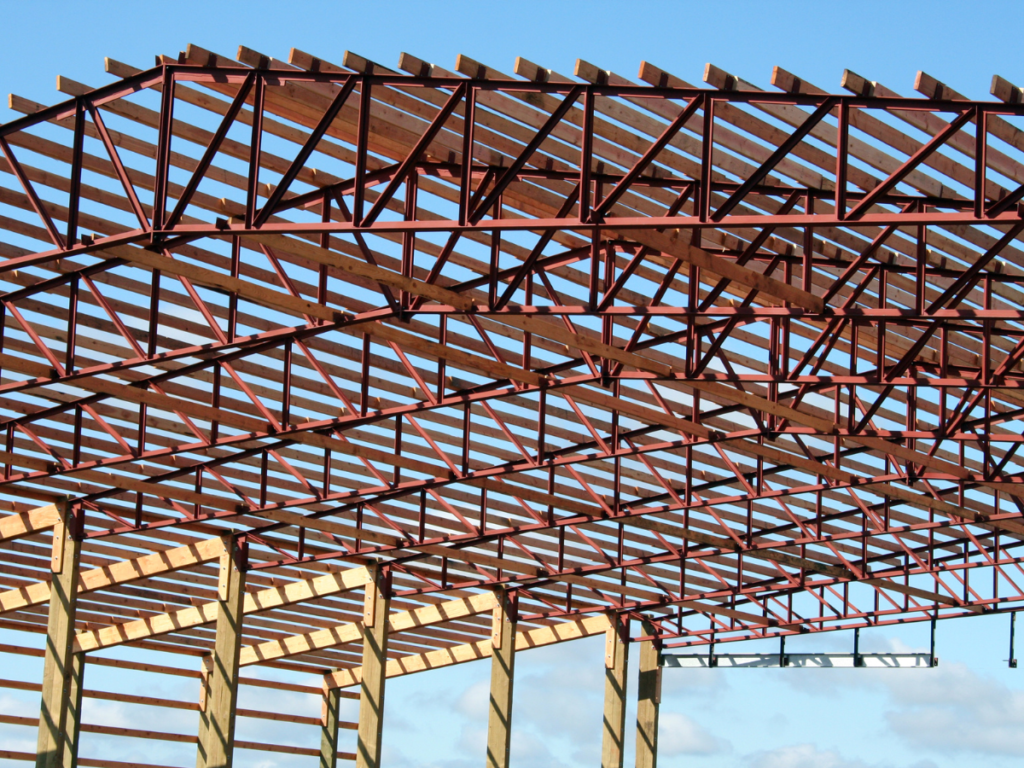
          Metal trusses

          Built to Last

          Properly engineered, galvanised metal trusses do not sag, rot, or invite termites. They resist wind and weather, hold their shape, and keep your barn standing for decades.

          Cost That Makes Sense

          Steel can cost more upfront, yet whole-life costs are lower. Less maintenance, fewer repairs, and faster builds usually offset the initial spend.

          More Space, Less Hassle

          Metal trusses can clear-span wide bays, creating open interiors. Fewer posts mean easier movement, storage, and layout options.

          Style Meets Strength

          Metal delivers a clean, modern look without sacrificing strength. Sleek lines, tough performance.

          Planning Your Pole Barn Project

          Know Your Purpose

          Decide what the barn is for: storage, workshop, animals, or a social space. Purpose drives size, layout, doors, and utilities.

          Pick the Right Spot

          Choose a level, well-drained site with good access and turning space. Consider utilities, setbacks, and future expansion.

          Set a Real Budget

          Create a realistic budget that covers trusses, posts, panels, concrete, slab, doors, insulation, labour, equipment hire, and permits. Don’t forget to keep a contingency, especially if you plan to install metal roofing on pole barn structures.

          Check Local Rules

          Check zoning, setbacks, and permit requirements early. Confirm snow, wind, and seismic loads and any inspections required.

          Materials & Tools You’ll Need

          Metal Trusses

          The structural core. Use engineer-stamped trusses sized for local loads and corrosion protection.

          Posts and Lumber

          Use UC4B/UC4C ground-contact treated posts and quality framing timber for doors and walls. Straight, dry stock makes assembly faster.

          Roofing & Siding Panels

          Steel panels are the go-to choice for most builds. When planning, consider gauge, profile, galvanised or painted finish, and trims. For a step-by-step guide to install metal roofing on pole barn, following the right specs ensures both durability and appearance.

          Tools of the Trade

          Post-hole auger, level, laser or string lines, drill/impact driver, saw, tin snips, and ladders or mobile scaffolds. Consider a telehandler for truss lifts.

          Fasteners & Hardware

          Use structural bolts, post caps/seat brackets, self-drilling roofing screws with sealing washers, hurricane ties, closure strips, and butyl sealant.

            Step-by-Step Guide to Building a Pole Barn with Metal Trusses

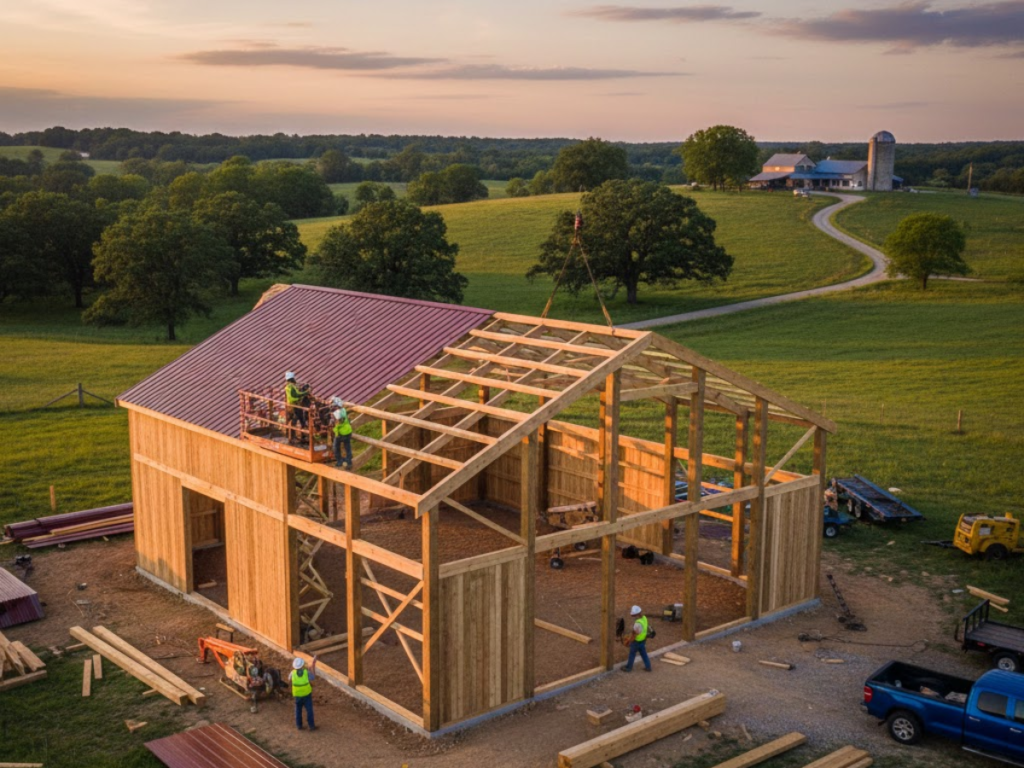
            pole barn with metal trusses

            Step 1: Mark Your Layout

            Set stakes and string lines to the plan dimensions. Check square using diagonals. Confirm setbacks, access, and drainage before digging.

            Step 2: Set the Posts

            Auger holes to code depth below frost line. Place treated posts with uplift protection and concrete backfill or use pier brackets. Plumb and brace each post.

            Step 3: Attach the Skirt Board

            Fix a treated grade or splash board along the base to lift panels off the ground and protect from splash-back. Keep it level for straight panels.

            Step 4: Place the Metal Trusses

            Lift trusses with proper equipment and fix to posts using approved brackets and through-bolts. Brace temporarily and verify spacing and bearing per the drawings.

            Step 5: Secure Purlins and Girts

            Install roof purlins perpendicular to truss top chords to the specified spacing. Fix wall girts horizontally between posts. Use structural screws or nails as specified.

            Step 6: Install the Roof Panels

            Fit underlayment or anti-condensation lining if specified. Lay panels from the leeward eave, maintain overlap per the profile, and fasten to purlins without over-driving screws. Use foam closures at eaves and ridge.

            Step 7: Add the Wall Panels

            Chalk a baseline on the splash board and keep panels plumb as you fix to girts. Use butyl tape at side laps if required and install corner trims as you go.

            Step 8: Frame the Openings

            Build framed openings to plan before panel install where possible. Add headers, jambs, and lintel support to carry loads and protect panel edges.

            Step 9: Install Doors and Windows

            Install door tracks, rollers, and hardware, then hang doors and fit windows to manufacturer instructions. Seal perimeters and check smooth operation.

            Step 10: Final Touches

            Fit ridge, eave, gable, and base trims with closures and sealant. Add gutters, downpipes, ventilation, and any internal lining. Complete final fixings and clean swarf to prevent rust

            Cost Considerations

            Materials

            Metal trusses, steel panels, treated posts, concrete, and trims drive the materials bill. Spec choices such as panel gauge, coatings, and door type change costs quickly

            Labour

            DIY saves money but extends timelines. Experienced crews reduce errors and rework. Equipment hire for lifts may be cheaper than extra labour.

            Extras

            Budget for insulation, slab or footings, electrical, lighting, ventilation, drainage, and site works. Keep a contingency for price swings and surprises.

            Common Mistakes to Avoid

            Skipping the Plan

            Build from a scaled plan with dimensions and load data. Accurate drawings prevent misaligned posts, uneven bays, and costly rework..

            Wrong Post Spacing

            Follow engineered spacing for posts and trusses. Incorrect spacing can overload members and void warranties.

            Ignoring Weather Loads

            Design for local wind, snow, and seismic loads. Use truss and connection ratings that meet or exceed code.

            Cheap Fasteners

            Use rated fasteners and connectors. Cheap or mismatched hardware corrodes, loosens, and compromises strength.

            Skipping Level Checks

            Check level, plumb, and alignment at every stage. Small errors compound into structural and aesthetic problems.

            Safety Tips When Working with Metal Trusses

            Gear Up Smart: Wear gloves, safety boots, eye and hearing protection, and a hard hat. Metal edges are sharp, so handle panels and trusses with care.

            Watch the Weight: Use mechanical lifts or a certified crew for truss handling. Never exceed rated capacities or work under suspended loads.

            Lock It Down: Brace trusses and secure temporary supports until permanent bracing is installed. Use fall protection when working at height.

            Final Thoughts

            Building a pole barn with metal trusses is achievable with good planning and safe practice. Use engineered components, follow the drawings, and keep quality checks frequent. Do that, and you will own a barn that looks sharp and lasts.

          • Metal Pole Barn Siding Options: A Complete Guide

            Metal Pole Barn Siding Options: A Complete Guide

            Choosing the right siding for your metal pole barn isn’t just about looks. It’s about durability, protection, and long-term value. This guide breaks down the top siding materials with their pros, cons, and practical tips so you can make a confident choice.

            What are the best metal pole barn siding options?

            The best siding options for metal pole barns include steel, aluminium, vinyl, wood, fibre cement, and corrugated metal. Each one balances durability, style, and budget differently, giving you flexibility depending on your priorities.

            Key Takeaways

            Steel siding is the most durable and low-maintenance choice. Aluminium resists rust in wet climates, vinyl is budget-friendly, wood adds rustic charm, fiber cement blends strength with style, and corrugated metal delivers utility with character.

            Why Siding Choice Matters for Your Pole Barn

            Metal siding options

            Protects Your Investment

            Siding isn’t just for looks; it’s your barn’s armor. The right choice keeps out rot, rust, and harsh weather, so you avoid costly repairs down the line.

            Impacts Energy and Comfort

            Good siding works like a solid jacket. It helps regulate temperatures inside, cutting down on drafts and keeping your space usable year-round.

            Defines the Look

            Your barn’s siding makes the first impression. Whether you prefer the modern edge of steel or the rustic warmth of wood, the siding you choose sets the tone for the entire build.

            Popular Metal Pole Barn Siding Materials

            Steel Panels

            Steel is the go-to choice. It’s tough, holds its look for decades, and stands strong against harsh weather. If you want durability with low upkeep and a clean, modern look, steel siding is a top option.

            Aluminum Siding

            Aluminum doesn’t rust, making it ideal for wet or coastal regions. It’s lighter than steel, easier to handle, and still maintains a sleek finish. The trade-off is that it’s not quite as strong as steel.

            Vinyl Siding

            Vinyl is affordable and easy to replace if a panel cracks. It comes in many color options, letting you customise your look without overspending. The downside is that it’s less durable than metal.

            Wood Siding

            Wood siding offers timeless rustic appeal, perfect if you want a cabin-style look. However, it requires more care, so expect to stain and seal it regularly to keep it protected.

            Fiber Cement

            Fiber cement is a hybrid material made from cement and cellulose fibers. It delivers the strength of concrete with a cleaner finish. Resistant to fire, rot, and pests, it’s a long-term, durable choice.

            Corrugated Metal

            Corrugated metal’s wavy pattern isn’t just stylish—it adds strength. This siding is durable, simple to install, and usually more affordable than flat steel. It’s a practical option with a distinctive look.

            Siding Profiles & Styles to Consider

            Vertical vs. Horizontal Panels

            Vertical panels give your pole barn that sleek, modern look. They also help rain and snow slide right off, so less mess. Horizontal panels feel more traditional, almost farmhouse chic, and they’re quick to install.

            Ribbed Panels

            Ribbed siding is a classic choice. It’s affordable, durable, and the ridges add strength while keeping the look simple and functional.

            Board & Batten

            Board and batten siding creates a rustic, textured appearance. Wide boards with narrow strips on top add depth and style, making it a great pick if you want your barn to stand out.

            Corrugated Metal

            Corrugated siding remains one of the most durable and low-maintenance styles. Its wavy lines not only add visual character but also improve strength, making it a practical choice for working barns.

            Smooth or Flat Panels

            Flat panels give a sleek, modern finish. They’re minimalist but stylish, ideal if you’re turning your barn into a living or working space where design matters.

              Comparing Metal vs. Other Siding Options

              metal bole barn siding options

              Metal Siding: Metal siding is low-maintenance, weather-resistant, and pest-proof. It offers strength with a clean, modern look.

              Wood Siding: Wood provides rustic appeal but requires ongoing sealing and care, which can add costs over time.

              Vinyl Siding: Vinyl is affordable and handles most weather, but is more prone to dents and fading than metal.

              Fiber Cement Siding: Fiber cement delivers durability and a classic look, but is heavy, harder to install, and usually more expensive.

              Key Factors When Choosing Pole Barn Siding

              Durability: Your siding must withstand weather, animals, and daily use. Steel is the strongest, vinyl requires little upkeep, and wood offers classic style with more care.

              Cost: Metal costs more upfront but saves on long-term maintenance. Wood delivers visual appeal but demands regular investment in upkeep.

              Style: Choose siding that complements your property. Steel panels provide clean lines, while wood gives rustic warmth.

              Insulation & Protection: Good siding keeps interiors comfortable while shielding your belongings from heat, cold, and moisture.

              Maintenance: Steel and vinyl are low-maintenance, while wood needs frequent attention to stay in top shape.

              Installation & Maintenance Tips

              Smart Installation: Start with level framing and use quality fasteners. Proper spacing keeps panels secure and prevents leaks.

              Easy Maintenance: Rinse your siding every few months. Touch up scratches quickly to stop rust, and keep nearby trees trimmed.

              Final Thoughts on Metal Pole Barn Siding

              Choosing siding isn’t about chasing trends; it’s about making a smart investment. Metal delivers durability, style, and fewer maintenance headaches. The right siding will enhance your barn’s look, protect your investment, and save you money in the long run.

            • How Many Posts for a 30×40 Pole Barn?

              How Many Posts for a 30×40 Pole Barn?

              Building a 30×40 pole barn? One of the first questions is how many posts you’ll need. The count depends on design, spacing, and purpose. This guide keeps it simple so you avoid mistakes and get a strong, stable build.

              How many posts do you need for a 30×40 pole barn?

              Most 30×40 pole barns need 14–16 posts, spaced about 8 feet apart.

              Key Takeaways

              • Standard spacing is 8 feet between posts.
              • A 30×40 barn typically needs 14–16 posts.
              • Start with 4 corners, then add posts every 8 feet.
              • Adjust count for heavy loads, soil type, roof style, or local codes.
              • Balance cost with stability—fewer posts save money, more posts add strength.

              Understanding Pole Barn Construction Basics

              posts for a 30x40 pole barn

              What Makes a Pole Barn Different?

              Pole barns skip the full concrete foundation. Instead, treated posts are set deep in the ground to anchor the whole structure. That keeps costs down and setup quick.

              Why Posts Matter

              Posts carry the weight of the roof and walls. Fewer posts give more open space, but spacing must be right to keep stability.

              Framing and Roof

              Girts and trusses connect the posts to form the frame. Then steel panels or other siding finish the walls and roof. The design is simple but engineered to handle weather stress.

              Standard Post Spacing for Pole Barns

              Typical Spacing

              Most pole barns run on 8-foot spacing between posts. It’s the sweet spot that balances strength, material use, and build time. Go wider and you’ll need beefier lumber, which spikes costs fast.

              Why It Matters

              Tighter spacing gives more support and a sturdier build. Wider gaps save posts but can feel shaky with heavy doors or lofts. Think of it like loose laces—things don’t hold right.

              Custom Adjustments

              Soil, snow load, and barn use all affect spacing. Heavy snow? Go closer. Just storing a mower? You can stretch it. The best move is checking with your kit supplier, since they’ll size it to your local conditions.

              Calculating Posts for a 30×40 Pole Barn

              Start with the Basics

              A 30×40 pole barn usually needs posts every 8 feet along the walls. That spacing keeps the structure solid without wasting lumber. You’re looking at roughly 14 to 16 posts total.

              Corners Count First

              Each corner provides stability, so you start with four posts. They act as anchors holding the barn together.

              Side Spacing

              On the 40-foot sides, you’ll drop in posts at 8-foot intervals. That’s five per side, including corners. For the 30-foot sides, you’ll usually land on four per side.

              Adjust for Use

              If this barn is just for storage, standard spacing works fine. Planning heavy loads, big doors, or loft space? Add a couple of extra posts for backup.

              Don’t Forget Local Codes

              Local codes may require changes to spacing based on snow, wind, or soil. A quick check with your inspector avoids costly delays.

              Bottom Line

              For most barns, 14–16 posts is the standard. Start with corners, space them at 8 feet, then add more if your design needs extra support.

                Factors That Affect the Number of Posts Needed

                How many post for 30x40 pole barn

                Building Size

                Bigger barns need more posts. A 30×40 build typically uses 14–16 posts, but add-ons can push that number higher.

                Post Spacing

                Standard spacing runs 8–12 feet apart. Tighter spacing means extra posts, giving you more stability.

                Soil & Foundation

                Soft soil or tricky ground calls for more posts to lock in strength. Solid concrete pads can help keep the count lower.

                Roof Style

                A heavy roof, like one with metal trusses or extra pitch, needs stronger support. That often translates to a few more posts.

                Intended Use

                Storage for lawn gear is one thing. Housing livestock or vehicles? You’ll want more posts to handle weight and traffic.

                Cost Implications of Post Count

                Fewer Posts, Lower Price

                Cutting down the number of posts can save you upfront cash. Fewer holes to dig, fewer posts to buy, and less labour. But here’s the catch: you might compromise stability if you skimp too much.

                More Posts, Higher Cost

                Adding extra posts bumps up material and labour costs. Each post means more concrete, brackets, and time spent. Still, you’re paying for a sturdier barn that handles weather like a champ.

                Finding the Sweet Spot

                The real flex is balance. You want enough posts for long-term strength without draining your wallet. Think smart, spend, not a cheap shortcut.

                Building Codes and Local Requirements

                Why It Matters

                Before setting posts, check your local rules. Permits are required in most areas, and skipping them can cost time and money.

                Zoning and Setbacks

                Every area has zoning laws that set limits on how close you can build to fences or neighbours. A quick call to your city office prevents issues later.

                Post Spacing Rules

                Some codes even dictate post spacing or foundation depth. Instead of guessing, confirm with your inspector so your barn passes the first time.

                Pro Tip

                Permits may feel like a hassle, but they ensure your barn meets standards and avoids future problems.

                Tips for Planning a 30×40 Pole Barn

                Lock in the Layout

                Think about what you’ll actually use the space for. Cars, tools, or maybe a side hustle gym? Sketch it out first, so you don’t end up short on room.

                Count the Posts Right

                Post spacing is the backbone. Most builds use 8-foot spacing between posts. Wider gaps risk sagging; tighter gaps can mean overspending.

                Pick Materials That Flex

                Steel posts flex against the weather, wood brings that rustic drip. Match your choice to your budget and vibe. It’s like picking sneakers—function plus style.

                Plan Ahead for Upgrades

                Want power, plumbing, or insulation later? Run conduits now. Future-you will thank present-you for saving the hassle and cash.

                Final Takeaway: How Many Posts Do You Really Need?

                For a 30×40 pole barn, plan on 14–16 posts as the standard. If you’re adding heavy loads or a loft, increase that number for stability. Posts are the barn’s backbone—the more you add, the stronger it gets.

              • How Much Is a 30×40 Pole Barn Kit?

                How Much Is a 30×40 Pole Barn Kit?

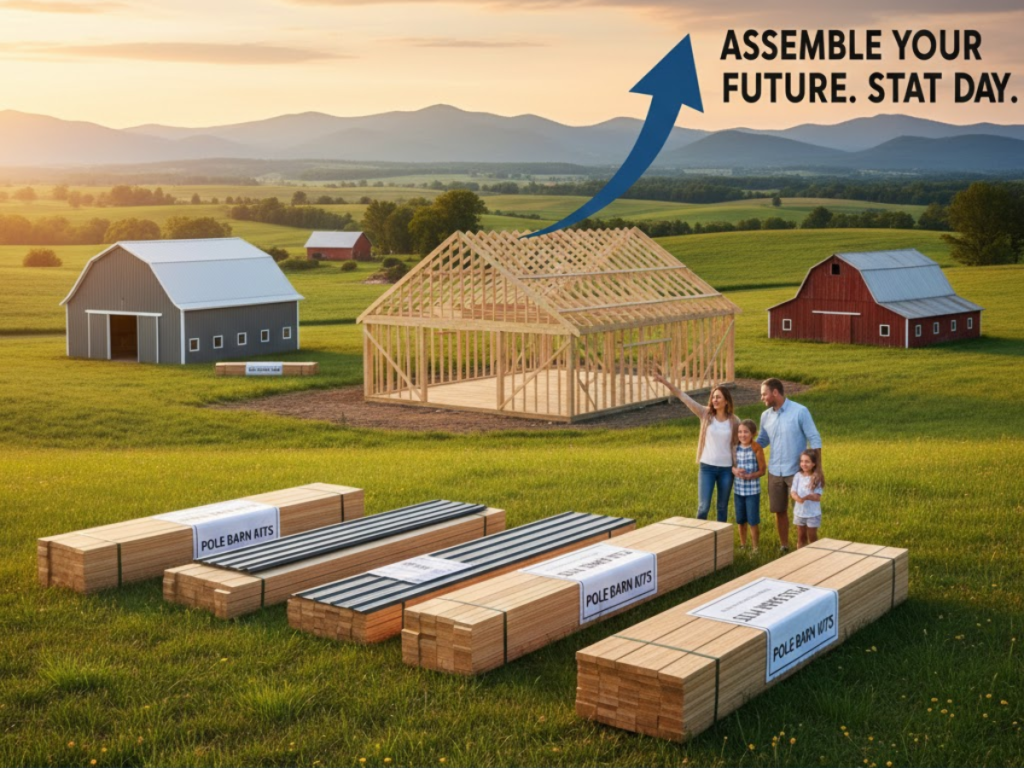
                Need extra space without overspending? A 30×40 pole barn kit gives you flexibility and solid value. This guide covers pricing, inclusions, and smart ways to maximise your budget.

                How much is a 30×40 pole barn kit?

                A 30×40 pole barn kit usually runs between $12,000 and $25,000. Basic storage kits fall on the low end, while insulated, upgraded versions push costs higher.

                Key Takeaways

                • Average kit cost: $12,000–$25,000
                • Price drivers: materials, location, foundation, and custom features
                • Kits save on labour, pros add speed and polish
                • Basic storage is cheapest, business-ready barns cost the most
                • Long-term ROI: durability, resale value, and everyday utility

                Why Choose a 30×40 Pole Barn Kit?

                30x40 Pole Barn Kit cost

                The Perfect Middle Ground

                A 30×40 kit balances space and practicality. It fits vehicles, tools, or even a home workshop without taking over your property.

                Easy on the Wallet

                Compared to larger barns, this size is affordable. Pre-engineered kits cut both material and labour costs.

                Flexible Use

                Use it as a garage, gym, or workshop. The 30×40 size adapts easily to changing needs, making it a practical long-term choice.

                Quick to Build

                Kits go up quickly compared to custom builds. Many owners have usable space in weeks instead of months.

                Average Cost of a 30×40 Pole Barn Kit

                Expect costs between $12,000 and $25,000, depending on materials, upgrades, and location. Add-ons like insulation or premium doors increase the price quickly.

                What’s Included

                Kits generally include framing, roofing, siding, and hardware. Labour isn’t included, keeping base costs lower. Extras like doors, windows, or insulation add thousands more.

                Factors That Push Price

                Delivery fees, supply chain costs, and local labour rates affect pricing. Steel siding offers durability, while wood trim improves appearance but raises cost.

                Smart Money Moves

                If you’re on a budget, stick with the starter kit and add upgrades later. DIY assembly trims labour costs, but hiring pros speeds up the build. Either way, knowing the price range keeps you from sticker shock.

                  Key Factors That Affect the Price

                  price 30x40 Pole Barn Kit

                  Materials

                  The type of metal you choose makes a big difference. Basic steel panels keep costs low, while thicker gauge or colour options add to the tab. If you’re after style points, those trims and finishes aren’t free.

                  Location

                  Where you live isn’t just about the weather. Shipping fees, local labour rates, and even building codes can raise or cut your final bill. Think of it like rent prices—zip code matters.

                  Foundation Choices

                  Some folks go with simple gravel bases to save cash. Others want full concrete slabs for durability. The more solid the base, the more it eats into your budget.

                  Custom Features

                  Windows, insulation, and fancy doors make your barn feel more like a flex than a shed. But every extra feature stacks onto the price. Keep it simple now, upgrade later if you want to spread out costs.

                  DIY vs Pro Build

                  If you’ve got the tools and confidence, building it yourself is a cheat code for saving on labour. Hire pros, and you’ll pay more upfront, but you’ll also cut down build time and headaches.

                  Cost Breakdown by Use Case

                  Garage or Vehicle Storage

                  A 30×40 pole barn for vehicle storage typically costs $20,000 to $30,000. Basic gravel floors keep costs low, while concrete and insulated doors push it higher. 

                  Keep it basic with gravel floors and simple doors, and you’ll stay on the low end. Add concrete, insulation, or sleek garage doors, and the price tag climbs fast.

                  Workshop or Hobby Space

                  A workshop setup averages $25,000 to $35,000, especially once you factor in electrical, lighting, and climate control.

                   You’ll need electrical, better lighting, and maybe climate control if you’re working year-round. That setup costs more, but it keeps your tools safe and your projects running smoothly.

                  Small Business or Retail Use

                  For small business or retail use, expect $30,000 to $40,000. These higher costs come from HVAC, polished finishes, and customer-ready upgrades.

                  Farm or Storage Barn

                  For simple farm or storage use, costs average $20,000 to $25,000. Dirt or gravel floors are the most affordable option.

                  Dirt or gravel floors keep costs down. It’s the no-frills option, but it gets the job done if you’re stacking hay, feed, or gear.

                  DIY Kit vs. Hiring a Builder

                  DIY Kit

                  Building it yourself is a major labour saver if you’re skilled and equipped. It requires time and tools, but the savings can be significant. The catch? You’ll need time, tools, and patience. Mess up, and those “savings” can shrink fast.

                  Hiring a Builder

                  Hiring a builder ensures code compliance, faster timelines, and professional quality. You’ll spend more upfront but gain efficiency and peace of mind. Sometimes peace of mind is worth the tab.

                  Long-Term Value and ROI of a 30×40 Pole Barn

                  Built to Last

                  A 30×40 pole barn isn’t a short-term fling. With quality materials and proper upkeep, you’re looking at decades of use without major repairs. That’s stability you can flex with confidence.

                  Smarter Investment

                  Instead of bleeding cash on storage rentals or constant fixes, this barn pays you back over time. Lower maintenance, higher durability, and resale potential make it a solid ROI play.

                  Everyday Wins

                  Whether it’s protecting gear, running a side hustle, or adding property value, the barn keeps delivering. Think of it as a steady asset, not a quick expense.

                  Tips to Save Money on a 30×40 Pole Barn Kit

                  Buy a Kit, Not Custom

                  Kits come pre-planned, so you’re not paying extra for design work. It’s a budget cheat code.

                  Keep the Add-Ons Minimal

                  Skip fancy finishes upfront. You can always flex later with upgrades when your wallet breathes.

                  Go DIY on Labour

                  If you’ve got basic tools and some grit, building it yourself cuts costs big time.

                  Shop Around for Deals

                  Suppliers run promos. Compare prices and snag discounts—it’s like catching sneakers on drop day.

                  Final Thoughts: Is a 30×40 Pole Barn Kit Worth It?

                  If you’re after solid space without draining your wallet, a 30×40 kit is a smart flex. It balances price and size, making it a crowd favourite.

                  The kit route keeps things simple, saves you cash, and still leaves room for upgrades later. If you want storage, a workshop, or just extra breathing room, this setup’s got your back.

                • How Much Does It Cost to Build a 30×40 Pole Barn?

                  How Much Does It Cost to Build a 30×40 Pole Barn?

                  Building a 30×40 pole barn often starts with one question: What’s the price tag? Costs swing widely depending on materials, design, and extras. This guide breaks it down so you can budget realistically and avoid nasty surprises.

                  How much does it cost to build a 30×40 pole barn?

                  A 30×40 pole barn typically costs between $20,000 and $40,000, depending on materials, location, and added features.

                  Key Takeaways

                  • Average cost: $20,000–$40,000
                  • Price drivers: size, materials, location, features
                  • Kits save money, custom builds add flexibility but cost more
                  • DIY cuts labour costs, while pros speed up the build
                  • Keep finishes simple or plan upgrades later to save

                  Why Choose a 30×40 Pole Barn?

                  Cost to Build a 30x40 Pole Barn

                  Just the Right Size

                  A 30×40 pole barn hits the sweet spot. It’s big enough for storage, hobbies, or a side hustle shop, but not so massive it eats your whole yard.

                  Flexible Setup

                  Use it as a garage, workshop, or even a mini event space. This size gives you room to flex without the cost of going oversized.

                  Budget-Friendly Build

                  You’ll spend less than you would on a larger barn but still get durability and function. It’s a practical upgrade that adds long-term value without draining your wallet.

                  Average Cost of a 30×40 Pole Barn

                  A 30×40 pole barn usually runs $20,000 to $40,000, depending on upgrades. On the low end, you’ll get a basic shell with roof, walls, and doors. Add concrete floors, insulation, and finishes, and the cost rises quickly. Location also matters—labour and materials vary by region. To save, keep finishes simple now and add upgrades later.

                  Key Factors That Influence Cost

                  Size and Layout

                  Bigger barn, bigger bill. A 30×40 setup is standard, but if you start adding lean-tos, lofts, or extra bays, the price tag climbs fast. Keep the layout clean if you’re aiming for budget-friendly.

                  Materials You Choose

                  Steel siding? Classic drip. Wood accents? Stylish flex but pricier. Roofing options also matter—metal lasts longer, and shingles save upfront cash. Decide what’s non-negotiable for you.

                  Foundation and Flooring

                  Some folks pour a full concrete slab, others keep it gravel. Concrete costs more but gives you a smoother workspace. If you’re parking rides or heavy gear, it’s worth the spend.

                  Insulation and Interior Finish

                  Want it to double as a workshop or hangout? Insulation and drywall crank up comfort, but also cost. If you just need storage, skip the extras and save.

                  Doors and Windows

                  Roll-up doors, sliding barn doors, or a glass front—each one tweaks the budget. Windows add natural light and style, but they’re not cheap. Prioritise function first, flex later.

                  Labour vs DIY

                  DIY is the cheat code for saving thousands, but only if you’ve got the skills (and patience). Hiring pros speeds things up and avoids mistakes, but expect a bigger bill.

                  Location and Permits

                  Building in the city? Permits and codes add extra hoops. Rural land is usually easier, but delivery fees can creep in. Always factor in local rules before breaking ground.

                  Extra Features

                  Electric, plumbing, or a second floor turn your barn into a mini home base. Great for lifestyle points, not so great for the wallet. Pick what you’ll actually use.

                    Additional Features That Increase Price

                    Price to Build a 30x40 Pole Barn

                    Insulation and Climate Control

                    If you want your pole barn to double as a workshop or hangout, insulation is a must. It keeps the space comfy year-round but adds to material and labour costs. Toss in heating or AC, and now you’re stacking extra bills for comfort.

                    Windows and Doors

                    A basic barn comes with minimal openings, but upgrading to roll-up garage doors, sliding doors, or full window sets increases costs. The added light and convenience are worth it for many owners, but it does raise the budget.

                    Interior Finishes

                    Bare framing is cheaper, but adding drywall, flooring, or a loft quickly increases costs. Both options get the job done, but finished interiors push the total much higher.

                    Electrical and Plumbing

                    Running lights, outlets, or water lines means calling in the pros. It’s not a DIY cheat code unless you’re licensed. Factor in the wiring, fixtures, and labour, and the total can spike quickly.

                    Exterior Upgrades

                    Gutters, overhangs, or upgraded siding give your barn curb appeal and durability. They’re the Rolex touch to your backyard build, but they don’t come cheap.

                    Cost Comparison: Kit vs. Custom Build

                    Kit Build: Going with a kit is the budget-friendly flex. You’re looking at a set price that usually covers materials, blueprints, and delivery. It’s like getting a furniture set from IKEA, but on a way bigger scale.

                    Custom Build: Custom means freedom, but also a bigger tab. You choose finishes, layouts, and add-ons that make the barn fit your drip. Labour and extras push the cost higher, but you get a build that’s 100% yours.

                    Ways to Save on Your 30×40 Pole Barn

                    Go Simple on Finishes

                    Skip fancy siding or trim if you’re tight on cash. A clean, basic build still flexes plenty of style.

                    DIY Where You Can

                    If you’re handy, knock out smaller tasks like painting or insulation. It trims labour costs fast.

                    Shop Off-Season

                    Winter builds or late-fall orders can snag better pricing. Contractors have more open schedules, too.

                    Compare Material Options

                    Steel, wood, or hybrid setups hit different price points. Pick what matches your budget and drip.

                    Final Thoughts: Is a 30×40 Pole Barn Worth It?

                    If you need storage, a workshop, or extra flex space, a 30×40 pole barn earns its keep. It’s roomy, cost-efficient, and tough enough to last. For most folks, it’s not just worth it, it’s a solid long-term move.

                  • How Much Are Pole Barn Kits?

                    How Much Are Pole Barn Kits?

                    Wondering how much a pole barn kit costs? The truth is, prices swing with size, materials, and extras. This guide shows you what drives costs and how to pick the best fit for your budget.

                    How much are pole barn kits?

                    Most pole barn kits fall between $7,000 and $30,000. Small starter kits can be found for around $4,000, while high-end custom builds may exceed $60,000.

                    Key Takeaways

                    • Average pole barn kit cost: $7,000–$30,000
                    • Price drivers: size, materials, custom features, location, labour
                    • Small kits start around $4,000; custom builds can exceed $60,000
                    • DIY saves money, turnkey saves time
                    • Off-season buying and smaller sizing cut costs

                    Average Cost of Pole Barn Kits

                    how to get a loan for a pole barn

                    There’s no single price tag for pole barn kits. On average, expect $7,000 to $30,000, depending on size, materials, and add-ons. A 24×24 kit sits near the lower end, while a 40×60 setup pushes toward the top.

                    What Drives the Price?

                    Square footage is the biggest driver. More space means more materials and labour. Extras like insulation, windows, or overhead doors quickly add to the total.

                    Budget-Friendly Tips

                    If you’re trying to keep it lean, skip luxury finishes and stick with a simple shell kit first. You can always add extras later once your wallet catches its breath. Think of it like buying sneakers—you can upgrade the drip, but the base pair still gets you moving.

                    Factors That Influence Kit Prices

                    Size of the Barn

                    Bigger barn, bigger bill. A 30×50 kit is going to cost way more than a 20×20. Think of it like sneaker sizes: the more material you need, the more you pay.

                    Materials Used

                    Steel usually costs more than wood, but it delivers far better durability and low maintenance. Adding insulation or premium finishes will raise costs, so choose materials based on how you’ll actually use the barn.

                    Custom Features

                    Features like windows, skylights, and upgraded doors improve function and style but also raise the total price. Decide which add-ons are essential versus optional.

                    Location & Shipping

                    Where you live matters. Rural delivery fees can sneak up on you, while local suppliers might save you cash. Always compare quotes before locking in.

                    DIY vs Pro Build

                    Some kits are designed for weekend warriors. Others basically require a crew with power tools. Labour costs stack quickly, so weigh if doing it yourself saves or sinks time.

                    Bottom line: prices aren’t random. They shift based on what you want, where you’re at, and how much sweat you’re willing to put in.

                    Cost Breakdown by Pole Barn Kit Type

                    Small Storage Kits

                    Think of these as the “starter pack.” Perfect for tools, bikes, or a side hustle workshop. Prices usually range from $4,000–$8,000, depending on size and finish.

                    Mid-Sized Barn Kits

                    These are the flex moves for hobby farmers or anyone needing space for a few vehicles. Expect $10,000–$20,000 with upgrades like insulation or windows pushing the tag higher.

                    Large Agricultural Kits

                    Large agricultural barns designed for livestock or equipment storage typically cost $25,000 to $50,000+. Width, roofing type, and specialised add-ons are what push prices higher.

                    Garage & Workshop Kits

                    Designed for gearheads and weekend builders. They fall in the $7,000–$15,000 zone, with costs rising if you add double doors or loft storage.

                    Custom Pole Barn Kits

                    Want your barn to flex like your favourite drip piece? Custom builds let you pick dimensions, siding, and extras. Prices start around $20,000 and can climb past $60,000 if you go all-in.

                    Pro tip: Think long-term. Spending more upfront on better materials usually means fewer repairs and more years of hassle-free use.

                      Kit Price vs. Turnkey Build Costs

                      Pole barn kit price

                      Buying a kit is the budget-friendly route. You’re paying for materials and handling the build yourself, which works if you’ve got tools, time, and some extra hands.

                      A turnkey build is the “Rolex flex” version. Everything’s handled for you, from permits to final nails, but the price tag stacks fast. Think convenience over sweat equity.

                      The move? Decide if you’d rather save cash with a DIY kit or save stress by going turnkey. It’s less about what’s cheaper and more about what fits your lifestyle.

                      How to Save Money on Your Pole Barn Kit

                      Compare Kits, Not Just Prices

                      Cheap isn’t always the flex. Look at what’s included before you swipe the card. A kit with hardware and instructions upfront saves you random runs to the store.

                      Size Smart

                      Go a little smaller if you don’t need the mega-barn. Shaving just a few feet off dimensions can drop thousands off the final bill.

                      DIY Where You Can

                      If you’ve got tools and a couple of buddies, skip pro labour. Doing the build yourself keeps cash in your pocket and adds bragging rights.

                      Buy Off-Season

                      Contractors aren’t slammed in winter. Ordering your kit then could score you discounts that suppliers don’t hype in peak season.

                      Frequently Asked Questions

                      1. How much do pole barn kits usually cost?

                      Most fall between $7,000 and $30,000. Price shifts with size, materials, and extras like insulation.

                      2. Do I need special tools to put one up?

                      Not really. A solid drill, ladder, and some friends are your cheat code for assembly.

                      3. Can I finance a pole barn kit?

                      Yep. Banks, credit unions, and even some suppliers offer financing options.

                      4. How long does it take to build a kit?

                      Smaller barns can be done in a weekend. Larger setups might stretch into a couple of weeks.

                      Final Thoughts – Is a Pole Barn Kit Worth the Cost?

                      A pole barn kit can be a smart choice if you want both value and control. You pay upfront but avoid inflated contractor markups.

                      If saving money while still getting lasting durability appeals to you, it’s worth it. The real win? Build once and enjoy for decades.

                    • How to Get a Loan for a Pole Barn

                      How to Get a Loan for a Pole Barn

                      Thinking about building a pole barn but stressing over the price tag? You’re not alone. From homeowners to farmers and small business owners, many rely on financing to bring their projects to life.

                      This guide breaks down smart loan options so you can plan your build without losing sleep over the budget.

                      How to get a loan for a pole barn?

                      To get a loan for a pole barn, review your credit, compare lenders, and prepare strong financial records to boost approval chances.

                      Key Takeaways

                      • A loan lets you build a pole barn now without draining savings.
                      • Options include personal, home equity, farm, construction, and dealer financing.
                      • Lenders check credit, income, property value, and down payment.
                      • Strong financial prep and clear plans improve approval odds.
                      • Always compare terms and watch for hidden costs.

                      Why Consider a Loan for Your Pole Barn?

                      how to get a loan for a pole barn

                      A pole barn is more than a basic structure it’s an investment. Whether it’s for storage, livestock, or a workshop, the upfront cost can feel heavy.

                      A loan helps you build sooner without draining savings, breaking payments into manageable chunks.

                      It also lets you invest in quality durable materials, insulation, and upgrades that raise long-term value. Plus, your barn can start working for you immediately, from protecting equipment to generating income.

                      Types of Loans Available for Pole Barn Financing

                      Personal Loans

                      A personal loan is one of the simplest ways to finance a pole barn. Banks and credit unions often offer fixed rates and set repayment terms. You won’t need collateral, but strong credit helps you qualify for better rates.

                      Home Equity Loans or HELOC

                      If you own a home, tapping into your equity can be a smart option. A home equity loan gives you a lump sum with predictable monthly payments. A HELOC works more like a credit card, letting you borrow as needed during the draw period.

                      Agricultural Loans

                      For farms or rural properties, agricultural loans are designed with barns and outbuildings in mind. These loans often come with longer terms and lower rates. Local lenders or the USDA may have specific programs for agricultural use.

                      Construction Loans

                      If your project is larger or more complex, a construction loan might fit. These loans release funds in stages as the barn is built. Once completed, the loan usually converts into a standard mortgage or term loan.

                      Dealer or Manufacturer Financing

                      Some pole barn companies partner with lenders to offer in-house financing. It’s convenient and tailored for these projects. Just compare the terms with outside lenders to make sure you’re getting a fair deal.

                      Factors Lenders Consider Before Approving Your Loan

                      Credit Score

                      Lenders want to know if you’re reliable with payments. A strong credit score shows you’ve handled debt responsibly in the past. If your score is low, work on paying down balances before applying.

                      Income and Debt Ratio

                      Your income versus your current debt load matters. Lenders check if you can comfortably take on another payment. Keep your debt-to-income ratio below 40% for better approval odds.

                      Property Value and Purpose

                      They also review the property where the barn will be built. A well-planned project that adds value to your land gives you more leverage. Be ready to explain its purpose—storage, farming, or business.

                      Down Payment

                      The more cash you put down upfront, the less risk for the lender. Even a 10–20% down payment can improve your approval odds while reducing loan size.

                        Steps to Apply for a Pole Barn Loan

                        how to get a loan for a pole barn

                        Review Your Credit

                        Start by knowing how much your pole barn will cost. Factor in materials, labour, and any extras like insulation or electricity. This helps you borrow the right amount without surprises later.

                        Review Your Credit

                        Lenders will look at your credit score before approving anything. Pull a free report and fix any errors. A stronger score usually means better rates.

                        Compare Lenders

                        Don’t settle for the first option. Check banks, credit unions, and even agricultural lenders. Each may offer different terms that fit your needs better.

                        Gather Documents

                        Be ready with income proof, tax returns, and project details. Having everything in order speeds up approval and shows lenders you’re serious.

                        Submit Your Application

                        Complete the application online or in person. Be accurate and thorough—missing details can delay approval.

                        Wait for Approval

                        Lenders may take a few days to review. Stay available in case they need more info. Once approved, you’ll get the funds and can start building.

                        Tips to Improve Your Chances of Loan Approval

                        Check Your Credit Score: Lenders look at your credit first. Pay off small debts and fix errors before applying.

                        Save for a Down Payment: A bigger down payment shows commitment. It also reduces the amount you need to borrow.

                        Prepare Strong Financial Records: Gather tax returns, bank statements, and income proof. Having organised documents speeds up approval.

                        Choose the Right Lender: Not every bank knows pole barn financing. Look for lenders with experience in construction or agricultural loans.

                        Show a Clear Plan: Present drawings, cost estimates, and intended use. A solid plan gives lenders confidence you’ll follow through.

                        Alternatives to Traditional Loans

                        Home Equity Line of Credit (HELOC): If you’ve built equity in your home, a HELOC lets you borrow against it. Flexible repayment makes it easier to manage.

                        Personal Loans: Unsecured personal loans are quick to get and don’t require collateral. They’re best if you need smaller amounts fast.

                        Agricultural or Farm Financing: Some lenders offer special financing for agricultural buildings. These often come with lower rates and longer terms.

                        Credit Unions: Local credit unions often provide better rates than large banks and may be more flexible with approvals.

                        Common Mistakes to Avoid When Financing a Pole Barn

                        Skipping the Budget Plan: Jumping in without crunching numbers first can leave you strapped later. Always know your total costs before applying.

                        Ignoring Loan Terms: Low monthly payments might look good, but long terms add up. Compare interest rates and total repayment amounts.

                        Not Checking Credit Options: Some lenders offer better rates for strong credit. Review your credit score and shop around before locking in.

                        Overlooking Hidden Costs: Permits, site prep, and upgrades often sneak up. Factor these into your loan amount so you’re not short.

                        Final Thoughts: Is a Loan Right for Your Pole Barn?

                        A loan isn’t a one-size-fits-all solution. If cash flow is tight but your vision is big, financing can keep the project moving without draining your wallet.

                        Weigh your timeline, budget, and long-term plans. If the monthly payments fit comfortably, a loan can be the key to building the barn you want sooner.