Category: Pole Barn

  • Can You Turn a Pole Barn into a House – See the Smart Way

    Can You Turn a Pole Barn into a House – See the Smart Way

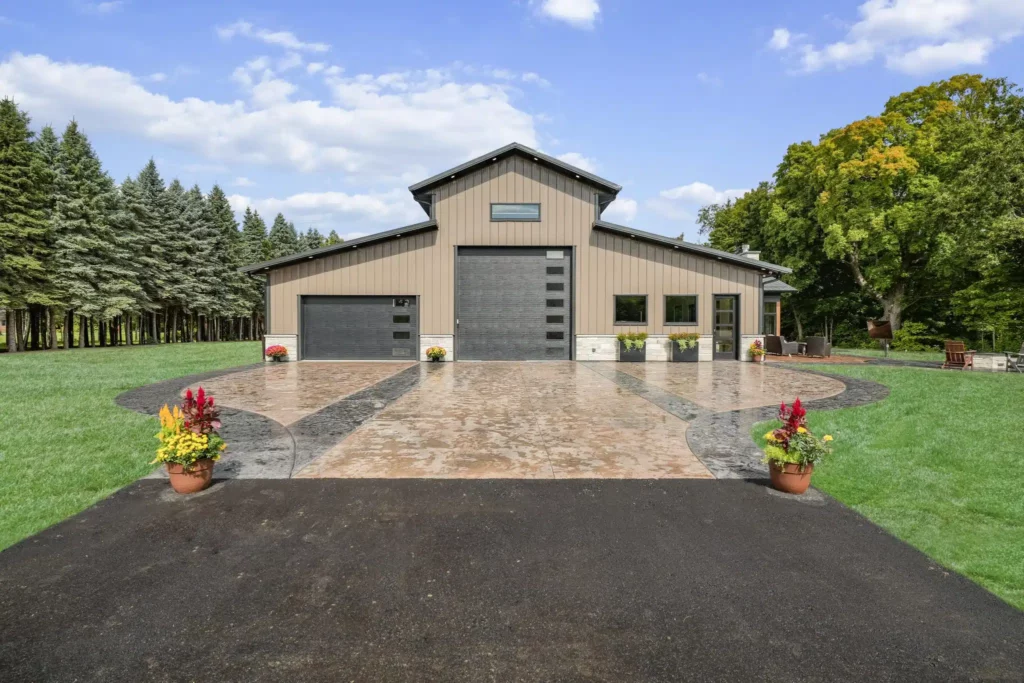
    Thinking of turning a pole barn into a home? It’s a unique, budget-friendly way to create a stylish and spacious living space. 

    From planning to finishing touches, this guide walks you through the conversion process, key benefits, and must-know considerations to make your dream barn home a reality.

    Can you turn a pole barn into a house?

    Yes, you can turn a pole barn into a house! With proper insulation, plumbing, electrical work, and finishes, pole barns can be transformed into comfortable living spaces.

    Key Takeaways

    • A pole barn can be turned into a home with proper planning and modifications.
    • The cost of converting a pole barn will vary based on size, materials, and the extent of the renovation.
    • Converting a pole barn offers cost savings, but zoning regulations, insulation, and electrical work must be addressed.

    What is a Pole Barn?

    What is a Pole Barn

    Before considering converting a pole barn into a house, it’s important to understand what a pole barn is. 

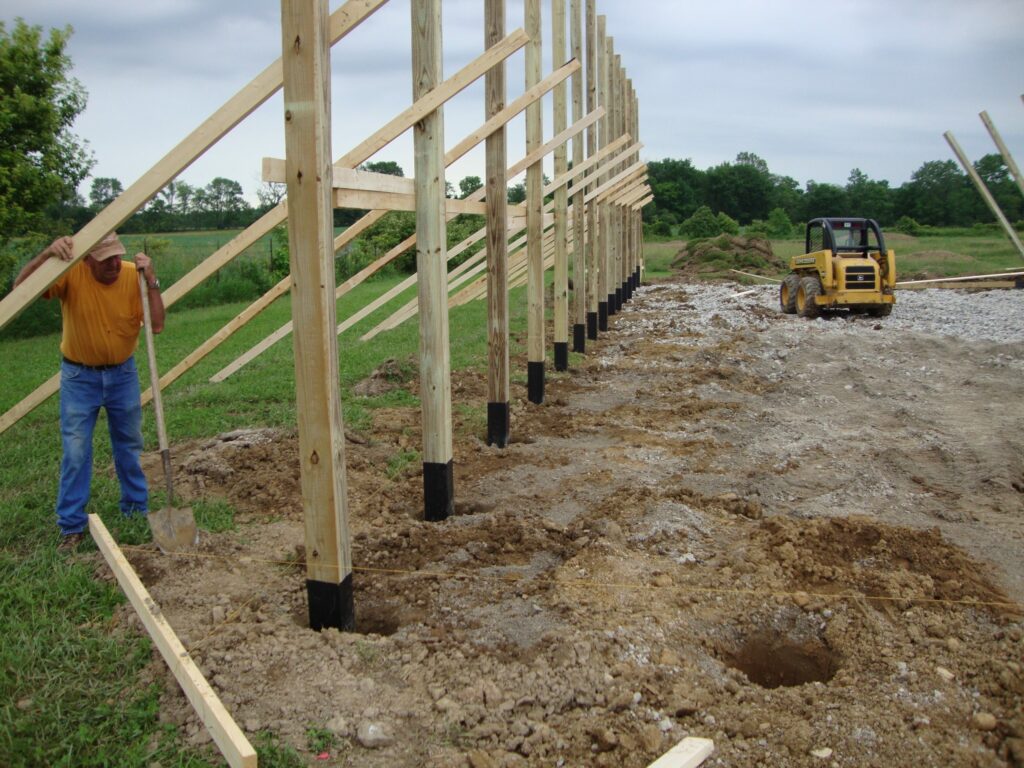
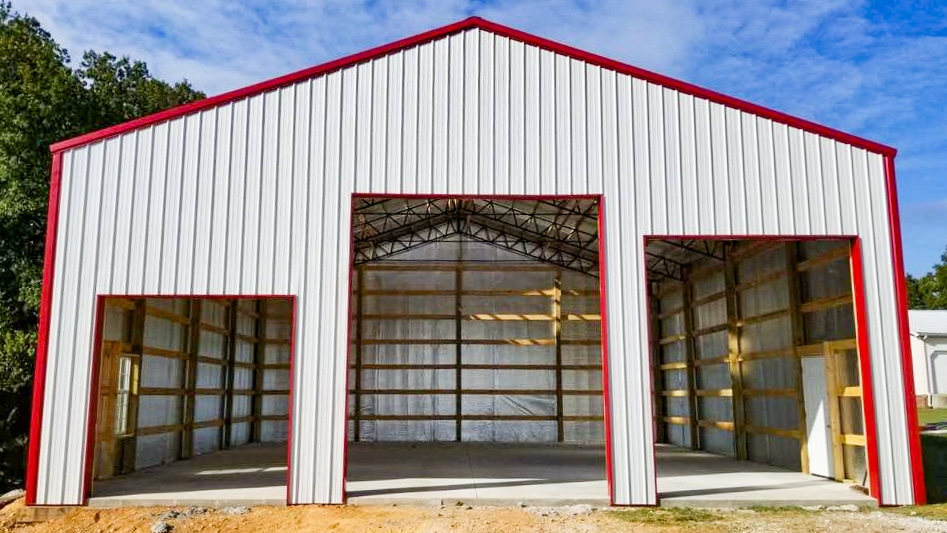
    A pole barn is a building with a frame supported by large posts or poles buried in the ground, rather than by a traditional foundation. 

    This construction method allows for large, open spaces inside without the need for load-bearing walls.Pole barns are often used as storage facilities, agricultural buildings, or garages due to their simplicity and cost-effectiveness. 

    However, their structure can be modified and turned into a livable space with the right changes.

    Is it Feasible to Convert a Pole Barn into a House?

    Yes, converting a pole barn into a house is feasible, but it requires careful planning. 

    While pole barns are designed for different purposes than residential homes, their large open spaces, sturdy frame, and affordability make them a great candidate for renovation into a comfortable home.

    The conversion process involves several important factors, including insulation, electrical systems, plumbing, interior finishes, and compliance with local zoning and building regulations. 

    Converting a pole barn into a home is often a more affordable option compared to building a new house from scratch, especially if you already own the land and the structure.

    Key Steps to Convert a Pole Barn into a House

    Key Steps to Convert a Pole Barn into a House

    Converting a pole barn into a home involves several essential steps. Here’s a breakdown of the process:

    Check Zoning and Permits

    Before starting the conversion, you need to ensure that your pole barn is located in an area where residential use is permitted. 

    Zoning laws vary by location, so it’s important to check with local authorities before you move forward to convert a pole barn into a house and ensure the project is legally allowed.

    You may also need to apply for various permits, such as building, electrical, and plumbing permits, depending on your renovation plans.

    Assess the Structure’s Integrity

    While pole barns are sturdy, not all pole barns are suitable for conversion. Have a professional inspect the existing structure to ensure that it is sound and capable of supporting a living space. 

    This will include checking the foundation, roof, and framing for stability. You may need to reinforce certain areas to meet residential building standards.

    Install Insulation

    Pole barns are not designed for temperature regulation, so insulation is one of the most critical steps in the conversion process. 

    You’ll need to install proper insulation in the walls, roof, and floor to ensure that your new home stays warm in winter and cool in summer.

    There are several insulation options to consider, including spray foam insulation, fiberglass batt insulation, or blown-in cellulose. 

    Your decision will ultimately come down to budget, climate, and the unique needs of your home. Before moving forward, it helps to check the cost to build a pole barn house so you can plan with confidence.

    Install Electrical and Plumbing Systems

    One of the most significant steps in converting a pole barn into a home is installing electrical wiring and plumbing systems. 

    Pole barns are not designed with residential utilities in mind, so you will need to hire a licensed electrician and plumber to run wires, install outlets, and set up pipes for water, drainage, and gas lines.

    Ensure that your electrical system is up to code and can handle the power needs of a modern home. 

    Additionally, you’ll need to connect the plumbing to the local water supply and sewer system (or install a septic system if you’re in a rural area).

    Create Interior Walls and Flooring

    Pole barns often have large open spaces, which means you’ll need to create interior walls to separate rooms and give the space structure. 

    This will likely involve building partition walls, adding windows and doors, and laying down flooring.

    When planning your interior, think about the layout that best suits your lifestyle. You might prefer a traditional setup with bedrooms, a kitchen, and a bathroom, or lean toward an open-concept design with a loft or spacious central area. Your choices here can also influence the overall cost to convert a pole barn into a house, so balancing style with practicality is key.

    Finish the Exterior

    The exterior of the pole barn may need some work to make it look more like a home. This could involve adding siding, painting, and installing windows and a proper entrance. 

    You may also want to add a porch, deck, or landscaping to boost the curb appeal of your finished home, which can influence the overall convert a pole barn into a house cost.

    Frequently Asked Questions

    1. Is it cheaper to convert a pole barn than to build a traditional home?

    It can be cheaper upfront, but costs vary based on the amount of structural work and code requirements in your area.

    2. Will a barn home appraise like a regular house?

    That depends on finishes, location, and the market. A well-finished barn home can appraise competitively if built to code.

    3. Can I do the conversion myself?

    Parts of it, yes—like framing and finishes. But plumbing, electrical, and structural work should be done or overseen by professionals.

    Conclusion

    Converting a pole barn into a house can be a cost-effective and creative way to build your dream home. 

    With careful planning, proper materials, and professional expertise, you can turn your pole barn into a beautiful, functional living space. 

    From energy efficiency and long-term savings to flexible layouts and faster builds, there are plenty of benefits to consider. Understanding the pole barn house conversion cost is often the first step in seeing why this option makes so much sense.

    If you’re interested in converting a pole barn into a home, consult with a professional to assess the feasibility of the project and help you navigate the necessary steps. 

    With the right planning, a pole barn can become the ideal home for you and your family.

  • How to Build a Loft in a Pole Barn – Smart DIY Tips You Need

    How to Build a Loft in a Pole Barn – Smart DIY Tips You Need

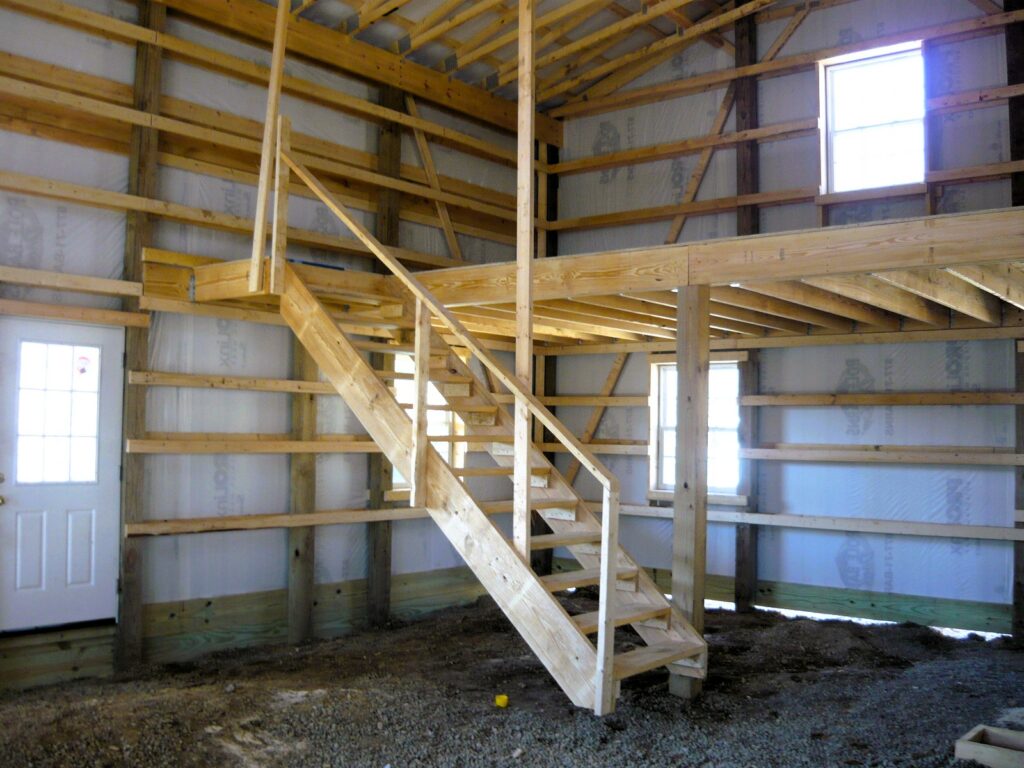
    Want to make the most of your pole barn? Adding a loft is a smart way to gain extra storage or even create a cozy living or work space. 

    Whether you’re expanding up for function or comfort, this guide walks you through planning and building a loft that adds serious value and versatility to your barn.

    How to build a loft in a pole barn?

    To build a loft in a pole barn, start by adding strong beams to support the floor. Install floor joists, lay down plywood, and ensure the loft area is well-ventilated and safe for use.

    Key Takeaways

    • A loft in a pole barn can provide extra storage or living space.
    • Proper planning and structural considerations are crucial for building a safe and durable loft.
    • Materials like wood, steel beams, and high-quality flooring should be chosen for durability and stability.

    Why Build a Loft in Your Pole Barn?

    Why Build a Loft in Your Pole Barn

    Before diving into the step-by-step process of building a loft, it’s important to understand the benefits of adding one to your pole barn. 

    Here are some of the top reasons why a loft is a great addition:

    Maximizing Space

    A loft helps to utilise the vertical space in your pole barn, providing more room for storage or creating a functional area without expanding the footprint of the building.

    Cost-Effective

    Compared to building a separate building or expanding the existing structure, adding a loft is often more affordable and quicker to complete.

    Versatility

    You can use the loft for a variety of purposes, including storage, an office, a living space, or even a place for hobbies or leisure activities.

    Step 1: Plan Your Loft Design

    The first step in building a loft is planning the design. You need to carefully consider how the loft will function and what its purpose will be. 

    Here are a few key factors to consider when planning your loft:

    Purpose of the Loft

    Decide how you will use the loft. Will it be used for storage, an office, or a living area? 

    When planning your build, the intended purpose will guide decisions like the size of the loft, necessary materials, and whether to include features such as insulation or electrical wiring. Reviewing detailed 30×40 pole barn with loft plans can help ensure you’re considering all the right elements from the start.

    Height Considerations

    Consider the height of your pole barn and the headroom available for the loft. 

    A loft should be tall enough to allow for comfortable movement beneath it, as well as sufficient clearance for the loft itself. 

    You will need to calculate the right height for both the loft and the space below to ensure it is functional and comfortable.

    Floor Area

    Measure the available floor area where the loft will be built. This will help you determine the size of the loft and ensure that it fits comfortably within the barn—especially if you’re working with a 30x40x12 pole barn kit, where maximizing usable space is essential. 

    You should also factor in space for support beams and other structural components that will be needed.

    Load-Bearing Capacity

    Consider the load-bearing capacity of the pole barn. 

    A loft adds extra weight to the structure, so you’ll need to be sure the barn can handle the load of the loft, furniture, and any stored materials. For design inspiration, you can view 30×40 pole barn with loft plans to see how others have successfully incorporated this feature.

    If you’re unsure, it’s a good idea to consult a structural engineer to make sure your barn can handle the additional weight.

    Step 2: Gather Materials and Tools

    Once you have your design ready, the next step is gathering the right materials and tools. For example, if you’re planning a loft in a 20×20 pole barn, you’ll need to have a solid list of common materials and equipment to get the job done efficiently:

    Materials:

    • Wood beams (for the loft frame)
    • Plywood or OSB boards (for the loft floor)
    • Steel supports or brackets (for additional stability)
    • Insulation (if needed)
    • Screws, nails, or bolts (for fastening the structure)
    • Wood for the staircase or ladder (if you plan to install one)

    Tools:

    • Tape measure
    • Circular saw or miter saw
    • Drill and drill bits
    • Level
    • Hammer or nail gun
    • Ladder or scaffolding
    • Safety gear (gloves, goggles, ear protection)

    Step 3: Build the Loft Frame

    Build the Loft Frame

    With your materials and tools ready, the next step is to build the loft frame. 

    This is a critical step because the frame will support the entire structure, so it’s essential that it is sturdy and well-constructed.

    Install Support Beams

    Begin by installing the support beams that will carry the loft’s weight. Make sure they’re securely anchored to the barn’s frame, just like you would when learning how to add a metal ceiling to a pole barn for extra strength and stability. 

    You can either attach the beams directly to the walls of the barn or to vertical posts depending on the layout and design. Make sure to use strong, durable beams such as 2x8s or 2x10s.

    Place Joists

    Next, install the joists that will provide the floor support for the loft. These joists should be spaced evenly apart, typically 16 to 24 inches, depending on the weight they need to support. 

    Secure the joists to the support beams with screws or nails. Make sure they are level and properly aligned.

    Install Brackets or Steel Supports

    For added stability, you may want to install brackets or steel supports where the joists meet the beams. This will help prevent shifting and ensure that the loft is secure.

    Frequently Asked Questions 

    1. How much weight can a loft in a pole barn support?

    The weight capacity of a loft depends on the materials used and the construction. Typically, a well-built loft can support hundreds of pounds per square foot, but it’s important to consult a professional if you have concerns.

    2. Can I build a loft in an existing pole barn?

    Yes, a loft can be built in an existing pole barn. However, you may need to reinforce the structure to support the additional weight, depending on the size and type of your pole barn.

    3. How long does it take to build a loft in a pole barn?

    The time required to build a loft depends on the complexity of the design, your skill level, and the materials used. On average, it may take anywhere from a few days to a few weeks to complete the project.

    Conclusion

    Building a loft in a pole barn is a great way to maximize your available space and create a functional, multi-purpose area. 

    With careful planning, the right materials, and proper construction techniques, you can build a loft that provides valuable storage or additional living space for years to come. 

    Whether you’re looking for extra storage or a cosy retreat, following these steps will help you create a loft that meets your needs and fits your space.

  • Do You Need a Permit for a Pole Barn? Don’t Risk Fines

    Do You Need a Permit for a Pole Barn? Don’t Risk Fines

    Planning to build a pole barn? Don’t grab your tools just yet you might need a permit first. Skipping this step could lead to fines or delays. 

    This guide covers when a permit is required, what factors affect the rules, and how to stay compliant so your project runs smoothly from start to finish.

    Do you need a permit for a pole barn?

    Yes, most areas require a permit for a pole barn, especially if it exceeds certain dimensions or is used for residential purposes. Always check with your local zoning office before starting.

    Key Takeaways

    • Whether or not you need a permit to build a pole barn depends on local zoning laws, the size of the barn, and its intended use.
    • Small, simple pole barns may not require permits, but larger or more complex structures likely will.
    • The process of obtaining a permit can involve submitting plans and paying fees, so it’s essential to do your research beforehand.

    What is a Pole Barn?

    What is a Pole Barn

    A pole barn, also known as a post-frame building, is a structure that uses large wooden posts (or steel columns) instead of traditional foundation walls. 

    The posts are placed directly into the ground or anchored into a concrete slab, which makes pole barns more affordable and easier to build compared to conventional buildings. 

    They are commonly used for agricultural purposes, workshops, storage, and garages.

    Do You Need a Permit to Build a Pole Barn?

    The short answer is that it depends. There are several factors that determine whether you need a permit to build a pole barn, including the following:

    Size of the Pole Barn

    One of the most important factors in determining whether a permit is required is the size of the pole barn. Smaller pole barns—such as a cheap 20×20 pole barn, which is often under a certain square footage—may not require a permit. 

    However, larger structures often do. Each municipality has different regulations regarding size thresholds, so it’s crucial to check your local building codes before beginning construction—especially if you’re planning to put up a 40×60 pole barn kit with installation, as such large-scale projects typically fall under stricter permitting requirements.

    Common Size Limits

    In some areas, if your pole barn is smaller than 200 square feet, you may not need a permit.  For larger structures, especially those exceeding 200 square feet, a permit is likely required.

    Zoning Regulations

    Your property’s zoning classification plays a significant role in determining whether you need a permit for a pole barn. 

    Zoning laws regulate how land is used in specific areas, and they can dictate whether you’re allowed to build a structure on your property, as well as the size, height, and intended use of that structure.

    Residential Zoning

    If you live in a residential area, there may be stricter rules about building a pole barn. 

    You may need a permit to ensure the structure fits within the neighbourhood’s aesthetic guidelines and doesn’t interfere with local property values.

    Agricultural Zoning

    On agricultural or rural properties, zoning laws are often more lenient, and you may be able to build a pole barn without a permit, especially if it’s used for farming purposes.

    Intended Use of the Pole Barn

    The intended use of your pole barn is another factor that may require a permit. If the pole barn will be used for storage or a garage, the process may be more straightforward. 

    However, if it will serve as a workshop or commercial space, more stringent regulations could apply.

    Storage or Residential Use

    Generally, pole barns used as storage or for personal use may not require a permit, especially if they are small.

    Business Use

    If the pole barn will be used for business purposes, including a workshop or office, a permit is more likely to be required. 

    This ensures that the structure meets the necessary safety codes and regulations for commercial properties.

    Steps to Determine If You Need a Permit

    Steps to Determine If You Need a Permit

    If you are unsure whether you need a permit for your pole barn project, follow these steps:

    Check Local Building Codes

    Start by checking with your local building department to find out what the specific requirements are for your area. Building codes vary from state to state, and even county to county, so it’s essential to get accurate, up-to-date information.

    Visit Local Websites

    Many local government websites provide detailed building code information and guidelines for permits. You may even be able to submit permit applications online in some areas.

    Consult with a Professional

    If you’re still unsure, it’s a good idea to consult with a professional builder or architect who is familiar with local building codes. They can help determine whether a permit is needed for your project and assist in navigating the application process.

    Consider Hiring an Expert

    Professional advice can be particularly useful if your project involves complex construction or if you plan to build a larger pole barn.

    Submit Plans and Applications

    If a permit is required, you’ll typically need to submit detailed plans of your pole barn design. This can include measurements, materials, and the proposed foundation. 

    Some locations also require an engineer’s stamp on the plans to verify the safety and structural integrity of the building.

    Be Prepared for Inspections

    Depending on your area, the building department may require inspections during the construction process to ensure the project is being completed according to code.

    Frequently Asked Questions 

    1. Do I need a permit for a small pole barn?

    It depends on the size and location. Smaller pole barns under 200 square feet may not require a permit in some areas, but it’s always best to check with your local building department.

    2. What happens if I build a pole barn without a permit?

    If you build a pole barn without a permit, you may face fines, penalties, or be required to remove or alter the structure. It’s essential to follow local regulations to avoid legal issues.

    3. How long does it take to get a permit for a pole barn?

    The time required to get a permit can vary. Typically, it may take anywhere from a few days to a few weeks, depending on your location and the complexity of your project.

    Conclusion

    Building a pole barn is an excellent way to add storage or workspace to your property, but it’s important to ensure that you follow local regulations and obtain the necessary permits. 

    The need for a permit will depend on factors such as the size, location, and intended use of the structure. 

    By checking with your local building department, consulting with professionals, and following proper procedures, you can ensure that your project is compliant and completed without complications. 

    Always be proactive in understanding your area’s permit requirements to avoid costly mistakes and legal issues in the future.

  • How Deep to Bury Pole Barn Posts – Avoid Costly Mistakes

    How Deep to Bury Pole Barn Posts – Avoid Costly Mistakes

    Wondering how deep to bury your pole barn posts? It’s a crucial step that impacts your barn’s strength, stability, and lifespan. 

    Go too shallow, and you risk structural issues. This guide breaks down what factors to consider and how to get the depth just right for a solid, long-lasting build.

    How deep to bury pole barn posts?

    Typically, pole barn posts should be buried at least 3-4 feet deep for proper support, but this can vary depending on soil conditions and local building codes.

    Key Takeaways

    • The depth of your pole barn posts is crucial for the stability of the entire structure.
    • The depth should be based on soil conditions, climate, and the size of your pole barn.
    • It’s important to follow local building codes and consult with professionals when necessary.

    Factors That Affect How Deep to Bury Pole Barn Posts

    Factors That Affect How Deep to Bury Pole Barn Posts

    Determining the depth of your pole barn posts isn’t just about digging a hole and setting the post in place. 

    Several factors will influence how deep the posts should go. These factors include soil conditions, climate, local regulations, and the size and design of your barn.

    Soil Conditions

    The type of soil in your area plays a major role in determining how deep you need to bury your posts. 

    Softer soils, like clay or sandy soil, may require deeper posts to ensure stability, while harder, more compact soils may need less depth. Here’s a breakdown:

    Soft or Loose Soils

    For areas with loose or sandy soil, posts should be buried deeper to keep the barn stable. When planning something like a 40×60 pole barn kit, it often means setting posts at least 4 feet or more to reach solid ground and ensure lasting strength.

    Rocky or Compact Soils

    In areas with rocky or compact soils, you may be able to get away with shallower post depths, around 3 feet. However, you may need to install additional support like concrete footings.

    Climate and Weather Conditions

    The climate in your area also affects the depth of your pole barn posts. In regions that experience heavy snowfall, freezing temperatures, or high winds, deeper posts are necessary to ensure the stability of the structure.

    Cold Climates

    In areas where the ground freezes in the winter, you must place your posts below the frost line. This depth can vary depending on your location, but the frost line generally ranges from 3 to 5 feet.

    Hot or Dry Climates

    In areas with dry and hot conditions, the depth of the posts may be slightly shallower as the ground doesn’t freeze. However, deep posts are still necessary to anchor the barn securely.

    Size and Weight of the Pole Barn

    The size and weight of your pole barn also play a significant role in determining how deep the posts should be buried. A larger barn, such as a 30×60 pole barn house or a 40×60 pole barn kit, will require deeper posts to support the structure effectively.

    Smaller Barns

    For small pole barns, such as those used for storage or garden tools, the posts may need to be buried around 3 feet deep, especially if the soil is stable and the climate is mild.

    Larger Barns

    For larger barns, such as those used for livestock or workshops, the posts should be buried deeper, often around 4 feet or more. These structures carry more weight and need more robust support.

    Recommended Post Depths for Different Situations

    Recommended Post Depths for Different Situations

    To give you a clearer picture, here’s a general guideline for how deep you should bury pole barn posts based on various conditions:

    Average Soil Conditions

    For typical soil conditions with moderate weather, burying the posts around 3 to 4 feet deep is often sufficient. However, you’ll want to adjust the depth based on the specifics of your soil and location.

    Soft or Sandy Soil

    If the ground in your area is soft, sandy, or prone to erosion, you may need to set the posts as deep as 4 to 5 feet. To keep the structure stable, adding concrete or gravel around the post is a smart move. When planning, it’s also worth considering How Far Apart Should Pole Barn Posts Be, since proper spacing works hand in hand with depth to create a solid foundation.

    Cold or Frost-Prone Areas

    In areas that experience freezing temperatures, the posts should be buried at least 6 feet deep or below the frost line to prevent shifting during freeze-thaw cycles.

    Rocky or Compact Soil

    If you’re building in an area with rocky or hard soil, the posts might need to be set around 3 feet deep, but you’ll want to make sure the posts are anchored firmly and that the hole is properly sized.

    Frequently Asked Questions 

    1. How deep should I bury pole barn posts for a small barn?

    For a smaller pole barn, posts should typically be buried at least 3 feet deep, depending on soil conditions and climate.

    2. Do I need to use concrete when installing pole barn posts?

    While concrete can provide additional strength and stability, it’s not always necessary. Gravel or soil alone may be sufficient in some cases, but concrete is recommended for larger or heavier structures.

    3. Can I install pole barn posts myself?

    Yes, with the right tools and proper knowledge, you can install pole barn posts yourself. However, if you have any doubts or your soil is difficult to work with, it may be best to hire a professional.

    Conclusion

    The depth at which you bury your pole barn posts is essential for ensuring the stability and longevity of your structure. 

    By considering factors like soil type, climate, and the size of your barn, you can determine the proper post depth to create a solid foundation. 

    Whether you’re building a small storage barn or a large workshop, proper post installation will ensure that your pole barn stands the test of time. 

    If in doubt, always consult with a professional to get the job done right.

  • How to Install a Window in a Metal Pole Barn – Get It Right

    How to Install a Window in a Metal Pole Barn – Get It Right

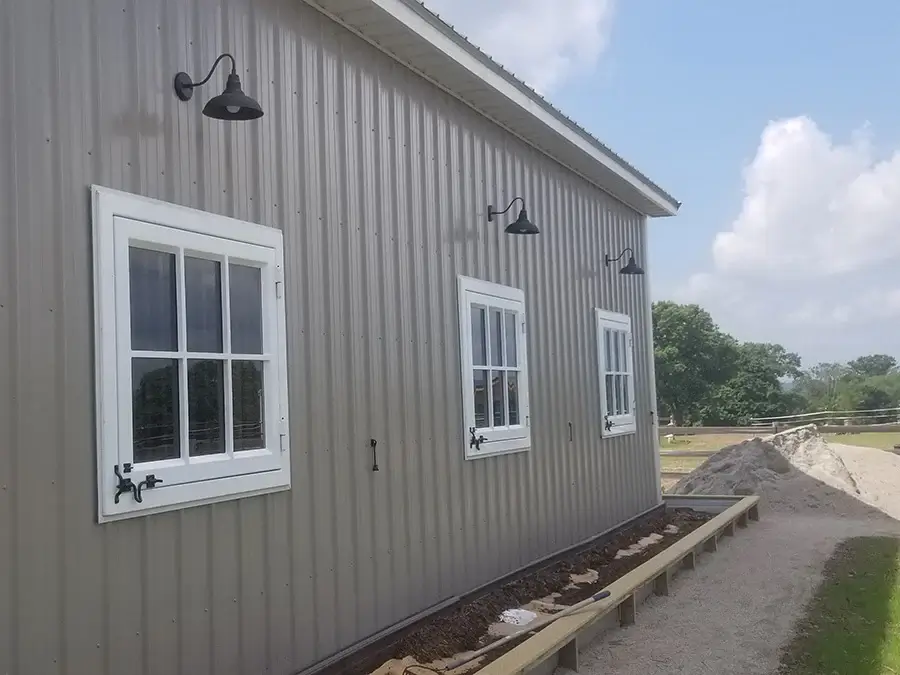
    Want to brighten up your metal pole barn? Adding a window is a great way to bring in natural light and fresh air perfect for workshops, storage, or living spaces. 

    This step-by-step guide shows you how to install a window in your pole barn, from prep work to finishing, for a more functional and inviting space.

    How to install a window in a metal pole barn?

    Install a window in a metal pole barn by cutting a hole in the wall where the window will fit. Install a window frame, secure the window, and seal around it to prevent leaks.

    Key Takeaways

    • Installing a window in a metal pole barn can increase natural light and improve airflow.
    • Proper planning, tools, and materials are essential for a successful installation.
    • You’ll need to ensure that the window is sealed properly to prevent leaks and weather-related damage.

    Why Install a Window in a Metal Pole Barn?

    Why Install a Window in a Metal Pole Barn

    Before diving into the installation process, it’s essential to understand why you might want to add a window to your metal pole barn. Windows offer several advantages:

    • Natural Light: Bringing natural light into your barn reduces the need for artificial lighting, which can save energy and create a more pleasant environment.
    • Ventilation: Adding a window boosts airflow, making the space more comfortable for work or living. Pairing it with metal ceiling installation for pole barns can also help regulate temperature and improve overall efficiency.
    • Aesthetics: A window can soften the utilitarian look of a metal barn and make the space feel more inviting.

    Increased Value: Adding windows may also increase the value of your property, particularly if you plan to convert the barn into a livable space.

    Tools and Materials You Will Need

    Before you start the installation process, make sure you have all the necessary tools and materials. Here’s a list of items you will need:

    Tools:

    • Power drill with metal drill bits
    • Screwdriver
    • Saw (circular or reciprocating saw)
    • Measuring tape
    • Level
    • Safety gloves and goggles

    Materials:

    • Window frame (ensure it’s the correct size for the hole in the barn wall)
    • Weatherproof sealant
    • Screws or bolts
    • Flashing
    • Metal sheeting (if needed)
    • Silicone or rubber gaskets for sealing

    Step-by-Step Guide to Installing a Window in a Metal Pole Barn

    Step-by-Step Guide to Installing a Window in a Metal Pole Barn

    Now that you have your tools and materials ready, follow these steps to install a window in your metal pole barn:

    Step 1: Choose the Right Location

    Before cutting any holes in your barn wall, decide where you want to install the window. Consider factors such as:

    • Light and Ventilation: Choose a spot that allows for maximum natural light and airflow.
    • Structural Integrity: Avoid placing the window where it could compromise the structure of the barn. Make sure the location is clear of structural beams or supports.
    • Height and Accessibility: Make sure the window is at a height that is accessible for cleaning and maintenance.

    Step 2: Measure and Mark the Window Opening

    Once you’ve decided on the location, measure the size of the window you want to install. Be sure to account for the size of the window frame, as well as any necessary gaps for insulation and sealing. If you’re working on a 30×60 pole barn, accurate measurements are especially important to ensure proper fit and energy efficiency.

    Use a measuring tape to measure the width and height of the window frame. Mark the dimensions on the barn wall using a pencil or chalk.

    Use a level to ensure the marks are straight and properly aligned.

    Step 3: Cut the Opening

    When preparing an opening for a new window, use a saw with a metal-cutting blade to follow the marked lines carefully. Always wear safety goggles and gloves to protect yourself from flying shards—especially since safety is just as important during construction as it is when you’re living in a pole barn.

    If you encounter difficulty cutting through thick metal, use a power tool such as a reciprocating saw or an angle grinder to make the cuts easier. Clean up any rough edges using a metal file to smooth them out.

    Step 4: Prepare the Window Frame

    Next, you’ll need to prepare the window frame. This involves placing the frame into the opening and ensuring it fits properly. The frame should be slightly smaller than the opening to allow for proper sealing and insulation.

    Dry-fit the window frame into the opening to check the fit. If necessary, trim the frame slightly to ensure a snug fit. Apply a weatherproof sealant around the edges of the window frame to prevent any moisture from entering the barn.

    Step 5: Install the Window Frame

    Once the frame is ready, carefully position it inside the opening. Use screws or bolts to attach the frame securely to the metal wall. If you’re installing a pre-fabricated window, follow the manufacturer’s instructions for attaching the frame.

    Use a drill to create pilot holes in the metal before inserting the screws or bolts. Make sure the frame is level and square before tightening the screws completely.

    Step 6: Add Flashing and Insulation

    To ensure the window is weatherproof, apply flashing around the edges of the window frame. Flashing is a material that directs water away from the window, preventing leaks.

    Place the flashing around the edges of the window and secure it with screws or adhesive.

    You may also need to apply insulation between the window frame and the barn wall to help regulate temperature and improve energy efficiency.

    Frequently Asked Questions 

    1. Can I install a window in any type of metal pole barn?

    Yes, most metal pole barns can have windows installed. However, it’s important to ensure the location you choose does not interfere with the structural integrity of the barn.

    2. How do I choose the right window size for my barn?

    Consider the purpose of the window (light, ventilation, or both) and the available space on the wall. Measure carefully and ensure the window fits within the opening while leaving room for proper sealing.

    3. Will adding a window affect the insulation of my barn?

    Adding a window can reduce insulation efficiency if not sealed properly. Be sure to use proper insulation and sealing materials around the window to maintain energy efficiency.

    Conclusion

    Installing a window in your metal pole barn can enhance its functionality and appearance. 

    Whether you’re adding a window for natural light, ventilation, or aesthetic reasons, the installation process is straightforward with the right tools and preparation. 

    By following the steps outlined in this guide, you can successfully install a window that will improve the comfort and efficiency of your space. 

    If you’re unsure about any of the steps or encounter challenges, it’s always a good idea to consult with a professional to ensure the job is done correctly.

  • How to Cut Pole Barn Metal – The Smart Way to Do It

    How to Cut Pole Barn Metal – The Smart Way to Do It

    Getting ready to cut metal for your pole barn? 

    Whether you’re installing panels or making upgrades, clean, accurate cuts are key. With the right tools and techniques, you can get pro-level results. 

    This guide walks you through how to cut pole barn metal safely and efficiently, no guesswork, just solid results.

    How to cut pole barn metal?

    To cut pole barn metal, use a metal-cutting saw, circular saw with a metal blade, or an angle grinder. Wear safety gear and make smooth cuts to avoid jagged edges.

    Key Takeaways

    • Cutting pole barn metal requires the right tools to ensure accuracy and safety.
    • Proper measurements and preparation are essential to avoid mistakes during the cutting process.
    • Always prioritize safety by wearing the appropriate protective gear.

    Types of Metal Used in Pole Barns

    Types of Metal Used in Pole Barns

    Before starting, it’s helpful to understand the types of metal typically used for pole barns. 

    Cutting metal for your pole barn can be an essential part of the building or renovation process. 

    Whether you’re installing new panels or replacing old ones, it’s important to have the right tools and techniques to achieve clean, precise cuts. 

    In this guide, we will take you through the steps of cutting pole barn metal and share helpful tips to ensure your project goes smoothly.

    Most pole barns use corrugated steel or galvanized steel panels, which are durable and provide excellent protection against the elements. 

    These metals are available in various thicknesses, so it’s important to choose the right type for your project.

    Corrugated Steel

    This is the most common metal used for the siding and roofing of pole barns. It’s easy to handle and provides great durability.

    Galvanized Steel

    Galvanized steel is coated with zinc to protect against corrosion. It’s commonly used for structural elements and roofing panels.

    Aluminum

    Sometimes, aluminum is used for pole barn roofs due to its light weight and resistance to corrosion. It can be more expensive than steel but is ideal for certain climates.

    The cutting process will vary slightly depending on the type of metal you are working with, but the basic principles remain the same.

    Tools You Will Need to Cut Pole Barn Metal

    Tools You Will Need to Cut Pole Barn Metal

    Choosing the right tools for the job is crucial to achieving clean and accurate cuts. Below are the most common tools used to cut pole barn metal:

    Power Shears

    Power shears are one of the best tools for cutting metal panels quickly and efficiently. They provide clean, straight cuts and can handle a variety of metals. 

    These tools work best for thinner panels and are ideal for straight cuts.

    • Advantages: Power shears are fast, easy to control, and produce clean cuts with minimal debris.
    • Considerations: They may not be suitable for very thick metal panels.

    Tin Snips

    For smaller or more intricate cuts, tin snips can be a good choice. They are ideal for cutting through thinner sheets of metal and can make both straight and curved cuts. 

    They are best for smaller projects or when you need to cut a small section of metal.

    • Advantages: Tin snips are inexpensive and easy to use for small cuts.
    • Considerations: They require more effort to cut through thicker materials.

    Circular Saw with a Metal Cutting Blade

    A circular saw equipped with a metal-cutting blade is a versatile tool that can handle a variety of materials. It’s particularly useful for making straight cuts through thicker metal panels.

    • Advantages: Circular saws are widely available and can cut through thicker metal easily.
    • Considerations: Circular saws can produce a lot of sparks and may require more cleanup after cutting.

    Angle Grinder

    Angle grinders are powerful tools that can be used to cut through various types of metal. 

    They’re particularly useful for making quick cuts and handling thicker materials. Angle grinders are ideal for cutting through metal pipes, rods, or bolts as well.

    • Advantages: Angle grinders are versatile and can be used for both cutting and grinding.
    • Considerations: They are noisy and produce sparks, so they require extra care when used.

    Jigsaw

    A jigsaw with a metal cutting blade is another option for cutting metal. It’s particularly useful for making curved or irregular cuts, as well as small adjustments in the metal.

    • Advantages: A jigsaw is versatile and can handle both straight and curved cuts.
    • Considerations: It may not be as effective for larger cuts in thicker metal.

    Preparing the Metal for Cutting

    Proper preparation is key to achieving accurate cuts when working with pole barn metal. Follow these steps to ensure the best results:

    Measure and Mark the Cutting Line

    Accurate measurements are essential to ensure that the metal is cut to the correct size. 

    Use a tape measure to determine the length of the metal panel that needs to be cut. Mark the cutting line with a permanent marker, chalk line, or a pencil to create a clear guide.

    Tip: Double-check your measurements before cutting to avoid any mistakes.

    Clamp the Metal Securely

    It’s important to secure the metal before cutting it to prevent movement during the process. Use clamps or a workbench to hold the metal firmly in place. 

    This will help ensure a straight and clean cut without any shifting or bending.

    Tip: If you’re cutting large sheets, consider using additional support underneath the metal to prevent it from bending under its own weight.

    Protect the Surface

    When cutting metal, it’s important to protect the surface underneath from sparks, heat, and debris. 

    Lay down a protective mat or use a metal cutting surface to catch any sparks or cuttings that may fall.

    Tip: If you’re using power tools, be sure to wear protective gear such as gloves, goggles, and a dust mask to protect yourself from flying debris.

    How to Cut Pole Barn Metal: Step-by-Step Guide

    Once you have your tools ready and the metal properly prepared, you can start cutting the pole barn metal. Below is a step-by-step guide to help you through the process.

    Step 1: Mark the Metal

    Begin by measuring and marking the metal where you want to make the cut. Use a straight edge or ruler to ensure that your line is straight and even. 

    Mark the metal with a pencil or chalk to create a visible line.

    Step 2: Set Up Your Cutting Area

    Secure the metal in place using clamps, making sure that the metal is firmly held and won’t move while you’re cutting. 

    If you’re working with a large piece, ensure it’s well-supported on both sides.

    Step 3: Begin Cutting

    Using the appropriate tool (e.g., tin snips, power shears, circular saw, etc.), begin cutting along the marked line. 

    For power tools, start the saw before making contact with the metal to avoid damaging the tool or material.

    Tip: Always cut in a straight line if possible. For curves, use a jigsaw or an angle grinder for more precision.

    Step 4: Smooth the Edges

    After cutting, the edges of the metal may be sharp or rough. Use a file or grinder to smooth out any jagged edges or burrs to make the metal safe to handle.

    Step 5: Clean Up

    Once you’ve finished cutting, remove any debris or dust from the area. Clean your tools and the workspace to maintain a safe and efficient working environment.

    Safety Tips for Cutting Pole Barn Metal

    Safety Tips for Cutting Pole Barn Metal

    When working with metal, safety should always be your top priority. Here are a few safety tips to keep in mind when cutting pole barn metal:

    Wear protective gear

    Always wear safety glasses, gloves, and ear protection when using power tools. The sparks from cutting can cause eye injuries, and metal shards can cause cuts.

    Work in a well-ventilated area

    If you’re using tools like an angle grinder, ensure you have proper ventilation to avoid inhaling dust or fumes.

    Keep tools maintained

    Ensure your tools are in good working condition to avoid accidents or suboptimal results.

    When to Call a Professional

    If you’re unsure about cutting pole barn metal yourself or if you’re working with particularly thick metal, it’s a good idea to consult a professional. 

    Professional metalworkers have the tools and expertise needed to make precise cuts and ensure the job is done safely.

    Frequently Asked Questions

    1. Can you cut metal panels with a wood saw blade?

    No. Using a wood blade can damage the blade, the panel, and create dangerous kickback. Always use a metal-rated cutting blade.

    2. What’s the cleanest way to cut metal roofing?

    Electric shears or a nibbler provide clean, burr-free cuts and minimize heat buildup, which protects the panel’s coating.

    3. Should I cut panels before or after installation?

    It’s usually easier and safer to cut panels on the ground before they’re installed. Pre-cutting also helps you double-check fit.

    Conclusion

    Cutting pole barn metal is a straightforward process if you have the right tools and know the proper techniques. 

    Whether you’re working with steel, aluminium, or another material, it’s essential to choose the right cutting method for your specific project—especially when dealing with large structures like custom steel pole barns.

    Always take the time to measure and prepare the metal properly, and prioritize safety throughout the process. 

    By following these tips, you can complete your pole barn project with confidence, knowing that the metal has been cut correctly and safely.

  • How to Close in a Pole Barn with Metal Trusses – Guide

    How to Close in a Pole Barn with Metal Trusses – Guide

    Framed your pole barn with metal trusses? Now it’s time to close it in and make it functional. 

    From walls and roofing to doors and windows, sealing the structure is key to durability and weather protection. 

    This guide walks you through every step to finish your pole barn strong, secure, and ready for action.

    How to close in a pole barn with metal trusses?

    To close in a pole barn with metal trusses, start by attaching your roof and wall panels to the trusses, then install insulation and siding for weather protection and energy efficiency.

    Key Takeaways

    • Closing in a pole barn with metal trusses involves installing walls, roofing, and doors.
    • The materials you choose, such as metal or wood, play a significant role in the barn’s durability and aesthetics.
    • Proper installation techniques are essential for ensuring a weather-resistant, long-lasting structure.

    Understanding the Basics of a Pole Barn with Metal Trusses

    Understanding the Basics of a Pole Barn with Metal Trusses

    Before getting started, it’s important to understand the structure of a pole barn with metal trusses. 

    A pole barn typically consists of vertical posts, horizontal girts, and trusses. The metal trusses provide the structural framework for the roof, while the posts and girts support the walls.

    Trusses

    Metal trusses are used for the roof framing and are designed to span large distances without the need for interior support beams. 

    They are ideal for pole barns as they allow for open space, making it easier to store equipment or use the barn for other purposes.

    Posts and Girts

    These vertical and horizontal supports form the skeleton of the barn. When you build a pole barn with metal trusses, you’re creating a stronger, longer-lasting frame that keeps the entire structure stable.

    The posts are typically made of wood or steel and are anchored into the ground, while the girts run horizontally to support the wall panels.

    Now, let’s explore the steps to close in the pole barn.

    Step 1: Install the Roof

    The first step in closing in your pole barn with metal trusses is to install the roof. 

    Since the metal trusses will already be in place, the roof installation is relatively straightforward, but it’s important to follow the correct procedure to ensure it’s secure and weatherproof.

    Prepare the Roof Panels

    If you’re using metal roofing panels, make sure they are pre-cut to the correct size for your barn. Whether you’re planning to build a 30×50 pole barn or a different size, it’s essential to measure the length of your roof and cut the panels accordingly.

    Attach the Panels

    Begin attaching the roofing panels to the metal trusses using screws or nails specifically designed for metal roofs. 

    Start from one side of the roof and work your way across. Make sure the panels overlap slightly to ensure that water doesn’t seep through.

    Seal the Roof

    Once the panels are in place, seal around the roof edges to keep leaks out. Make sure every seam and joint is tight. For extra guidance, check this resource on see how to install a metal ceiling in a pole barn to finish the job right.

    By following these steps, you’ll create a sturdy and weather-resistant roof for your pole barn.

    Step 2: Build the Walls

    Once the roof is in place, the next step is to build the walls. The type of wall material you use will depend on your preferences and the intended use of the barn. 

    Most commonly, pole barn walls are made from wood, metal, or a combination of both.

    Wooden Walls

    Wooden walls provide a traditional aesthetic and are relatively easy to install. To build wooden walls:

    Install the Girts

    Start by attaching horizontal girts to the vertical posts, ensuring everything is level and evenly spaced. Proper alignment is just as important here as when planning trusses for a 30×40 pole barn, since both steps affect the overall strength and stability of the structure.

    Install Wall Panels

    Attach wooden panels or siding to the girts. These can be plywood, OSB, or other types of wood panels. Use screws or nails to secure the panels tightly to the girts.

    Metal Walls

    Metal walls are often preferred for their durability and low maintenance. To install metal walls:

    Attach Vertical Girts

    Just like with wood-framed walls, you’ll begin by attaching vertical girts to the posts to support the metal panels. If you’re also planning the roof structure, it helps to know how many trusses do you need for a 30×40 pole barn span, since that will determine both strength and spacing for the rest of the build.

    Install Metal Panels

    Align and secure the metal panels to the girts. Make sure the panels overlap slightly to prevent water from entering through the seams.

    Both wooden and metal walls offer durability, but metal is more resistant to weathering and pests.

    Step 3: Install Doors and Windows

    Install Doors and Windows

    Once the roof and walls are in place, you can move on to installing doors and windows. 

    This step will allow you to customize the barn for your specific needs, whether you’re using it for storage, livestock, or a workshop.

    Garage Doors

    For a large barn, installing a garage door is often the most practical solution. Here’s how to install a garage door:

    Measure the Opening

    Before purchasing a garage door, it’s important to measure the width and height of the opening where the door will be installed. Taking precise measurements, much like planning out 30×40 pole barn truss spacing, ensures everything fits correctly and avoids costly adjustments later.

    Install the Frame

    Attach the frame for the garage door to the wall, making sure it is level and square.

    Install the Door

    Slide the garage door into the frame and secure it with the necessary hardware, such as tracks, rollers, and brackets.

    Standard Doors

    If you only need a standard entry door, pick a size that suits your space and attach it just like you would a garage door. While planning, also take time to explore siding solutions for your metal pole barn to keep the structure durable and visually consistent.

    Use hinges to allow the door to swing open and closed.

    Windows

    For natural light or ventilation, you may want to install windows in your pole barn. The process for installing windows is similar to installing a standard door:

    Cut the Opening: Measure and cut the opening for the window in the wall material.

    Install the Window: Place the window into the opening and secure it with screws or nails.

    Frequently Asked Questions

    1. Can you use metal siding directly on metal trusses?

    No. Metal trusses need girts or wood framing between them to support siding. Siding cannot attach directly to open trusses without support.

    2. Do I need a permit to enclose a pole barn?

    It depends on your local building codes. Always check with your county or city before starting construction.

    3. Will enclosing a barn increase its value?

    Yes. A fully enclosed barn adds functionality, weather protection, and resale value—especially if it’s insulated and has power or water.

    Conclusion

    Closing in a pole barn with metal trusses is a process that involves careful planning and proper execution. 

    By following these steps installing the roof, building the walls, adding doors and windows, and considering insulation and finishing touches you’ll create a secure, weather-resistant, and functional structure for your home or business.

  • How to Build a Metal Pole Barn – Step-by-Step Guide You Need

    How to Build a Metal Pole Barn – Step-by-Step Guide You Need

    Thinking about building a metal pole barn? It’s a strong, budget-friendly choice for storage, workshops, or livestock. 

    From planning and permits to construction tips, this guide walks you through each step to help you build a durable barn that stands the test of time.

    How to build a metal pole barn?

    To build a metal pole barn, start by setting the posts in concrete, then attach the framing. Add metal panels to the walls and roof, ensuring each piece is level and secure.

    Key Takeaways

    • Metal pole barns offer a long-lasting and cost-effective building solution for various needs.
    • The construction of a pole barn involves careful planning, proper materials, and the right equipment.
    • You need to be aware of local building codes, permits, and the foundation required before starting the project.

    Step 1: Planning Your Metal Pole Barn

    Planning Your Metal Pole Barn

    Before you begin construction, it’s important to plan your metal pole barn thoroughly. 

    This includes deciding on its purpose, size, and location. For example, if you’re considering building a 30×50 pole barn, proper planning will ensure that your structure is functional, safe, and compliant with local building regulations.

    Determine the Purpose of Your Pole Barn

    Understanding the primary function of the pole barn is key to designing it appropriately. Are you using it for storage, as a workshop, or for agricultural purposes? 

    The purpose will dictate the size, layout, and features you’ll need to incorporate, such as windows, doors, or ventilation systems.

    Check Local Building Codes and Permits

    Before you dive into construction, check with your local building department about zoning requirements, building codes, and permits. This step is just as important as understanding the overall building a pole barn house cost, since both factors play a big role in planning your project.

    Some areas may require you to obtain a building permit before Some areas may require you to obtain a building permit before starting construction, so it’s important to secure the necessary approvals first. If you’re planning ahead, click here to see how many trusses you’ll need for a 30×40 pole barn so you can budget and prepare properly.

    Plan the Size and Layout

    Measure the space where the barn will be built and determine the dimensions of the structure. Consider the height, width, and depth to accommodate your needs. 

    Remember to account for doors, windows, and any additional features you want to include. It’s also wise to leave some space around the structure for proper drainage and ventilation.

    Step 2: Gather Materials and Tools

    Building a metal pole barn requires specific materials and tools. Gathering everything you need beforehand will save you time and ensure a smoother construction process.

    Materials for Building the Barn

    The materials you will need include:

    • Metal Poles: These beams serve as the main supports for the structure, tailored in size to fit your barn’s design. Pairing them with the right metal pole barn siding options for durability ensures the whole build stays strong and long-lasting.
    • Metal Sheets: For the roofing and siding. Choose durable and weather-resistant sheets for optimal protection.
    • Concrete: For pouring the foundation and securing the poles.
    • Trusses: These are used to support the roof.
    • Fasteners: Bolts, screws, and other hardware will be required to secure the frame and metal panels.
    • Wooden Beams: For additional support, especially for any doors or windows.
    • Insulation: If you plan to insulate your pole barn, you will need materials like fiberglass or spray foam insulation.

    Tools Needed

    Here’s a list of essential tools for constructing a metal pole barn:

    • Power drill
    • Wrenches and ratchets
    • Hammer
    • Measuring tape
    • Level
    • Concrete mixer (optional, if mixing concrete by hand)
    • Safety gear (gloves, goggles, hard hat)

    Step 3: Prepare the Site and Foundation

    A solid foundation is critical to the stability of your pole barn. Most metal pole barns use either a gravel or concrete foundation, depending on the size and purpose of the structure.

    Clear the Land

    Before construction begins, it’s important to clear the land where your pole barn will go. Remove any trees, rocks, or debris, and level the area to create a stable foundation. If you’re planning a specific size, like a 30×60 structure, be sure to discover details on 30×60 pole barn to ensure proper site prep and layout.

    Mark the Pole Positions

    Once the land is cleared, mark where each pole will go. 

    These marks should align with the measurements from your planning stage, ensuring that the barn will be built according to your specifications.

    Dig Holes for the Poles

    Using a post hole digger, dig holes for the metal poles. The holes should be deep enough to anchor the poles securely. 

    A typical depth is around 3–4 feet, though this can shift based on soil and the height of your barn. If you’re weighing what is better a pole barn or metal building, factors like foundation depth play a big role in the decision.

    Pour Concrete

    After positioning the poles in the holes, mix and pour concrete into each hole to secure the posts. 

    Make sure the poles are level and plumb before the concrete sets. Allow the concrete to cure for at least 24 hours before moving to the next stage.

    Step 4: Build the Frame and Install the Roof

    Build the Frame and Install the Roof

    The next phase involves constructing the frame of your pole barn and installing the roof structure.

    Install Horizontal Beams and Trusses

    Once the poles are set, install horizontal beams between the poles to form the framework. These beams will support the roof and walls. Afterward, place the trusses across the frame. 

    Trusses play a crucial role in giving the roof proper support, especially when working with heavier metal panels. Learning how to build a pole barn with metal trusses ensures your structure stays strong and stable for years.

    Install the Roofing Panels

    Begin installing the roofing panels by securing them to the trusses with screws or nails. 

    Metal roofing panels are typically installed from one end to the other, overlapping each piece slightly to prevent leaks. 

    Make sure the panels are aligned and secure before moving on to the walls.

    Frequently Asked Questions 

    1. How long does it take to build a metal pole barn?

    The construction of a metal pole barn usually takes 2–4 weeks, depending on its size and design complexity. Factoring in the steps to install metal roofing on pole barn can also influence the overall timeline.

    2. Do I need a permit to build a metal pole barn?

    Yes, you will likely need a permit to build a pole barn. Contact your local authorities to ensure that you comply with zoning and building regulations.

    3. Can I build a metal pole barn myself?

    Yes, it is possible to build a metal pole barn yourself if you have the necessary skills and tools. However, it’s important to be aware of local regulations and building codes. If you’re unsure, consider hiring a professional.

    Conclusion

    Building a metal pole barn is a rewarding project that requires careful planning, the right materials, and attention to detail. 

    Whether you’re constructing the barn for storage, a workshop, or as a barn for livestock, following these steps will ensure a durable and long-lasting structure. 

    Remember that while the process can be a lot of work, the results will be worth it, providing you with a reliable and functional space for years to come.

  • How to Insulate a Metal Pole Barn – Here’s What Works

    How to Insulate a Metal Pole Barn – Here’s What Works

    Turning your metal pole barn into a cozy, energy-efficient space? Insulation is the key. Whether it’s for work, storage, or living, the right insulation keeps temps steady and bills low. 

    This guide walks you through the best insulation methods and tips to help you get the job done right.

    How to insulate a metal pole barn?

    Insulate a metal pole barn by installing foam board, spray foam, or batt insulation between the posts and the walls. Consider reflective insulation for a more energy-efficient solution.

    Key Takeaways

    • Insulating a metal pole barn helps regulate temperature and reduces energy bills.
    • Popular insulation materials for pole barns include spray foam, fiberglass, and rigid foam board.
    • Proper installation and sealing are crucial for achieving optimal performance from your insulation.

    Why Should You Insulate a Metal Pole Barn?

    Why Should You Insulate a Metal Pole Barn

    Insulating your metal pole barn offers several benefits, particularly if you plan to use the space for more than just storage. Metal buildings tend to have poor natural insulation, which can lead to temperature fluctuations, condensation, and increased energy costs. 

    Insulating the barn helps to address these issues and makes the space more comfortable year-round.

    Temperature Regulation

    Without insulation, metal barns can get extremely hot in the summer and cold in the winter. Insulation helps maintain a stable temperature inside, keeping it cooler in the summer and warmer in the winter. This is especially important if you’re using the barn as a living space or workspace.

    Energy Efficiency

    Insulating the barn helps cut energy bills by reducing how much heating or cooling is needed. When you understand the difference between pole barn and metal building, you’ll see how proper insulation in a metal structure minimises heat loss or gain, letting your systems run far more efficiently.

    Condensation Prevention

    Metal surfaces are prone to condensation, which can lead to moisture buildup, mold, and mildew. Insulation acts as a barrier against moisture, preventing it from collecting on the inside of the walls.

    Different Insulation Options for a Metal Pole Barn

    There are several insulation materials to choose from, each with its own set of advantages. The right material for your pole barn will depend on your budget, climate, and how you intend to use the space.

    Spray Foam Insulation

    Spray foam insulation is one of the most effective options for insulating a metal pole barn. It expands as it’s applied, filling in gaps and cracks to provide a solid barrier. Spray foam is ideal for areas where other materials may not reach, such as tight corners or hard-to-reach spots.

    • Advantages: Excellent at sealing gaps, provides high R-value (thermal resistance), prevents moisture buildup, and is energy-efficient.
    • Disadvantages: Higher upfront cost, requires professional installation, and can be more difficult to remove if you ever need to change it.

    Fiberglass Insulation

    Fiberglass insulation is a popular and cost-effective option for insulating metal buildings. It’s available in rolls or batt form and is typically installed between the studs, posts, and rafters of the barn.

    • Advantages: Affordable, easy to install (DIY-friendly), and widely available.
    • Disadvantages: May not be as effective in areas with high moisture, requires vapor barriers to prevent moisture buildup, and can irritate the skin during installation.

    Rigid Foam Board Insulation

    Rigid foam boards, like polystyrene or polyurethane, are solid panels with excellent insulation value. Lightweight and easy to cut, they can be installed directly against walls or ceilings, making them a practical choice when installing metal ceiling panels in pole barn projects.

    • Advantages: High R-value, moisture-resistant, easy to install, and lightweight.
    • Disadvantages: More expensive than fiberglass, and the seams must be properly sealed to avoid heat loss.

    Reflective or Radiant Barrier Insulation

    Radiant barrier insulation is a reflective material that works by reducing heat transfer. It’s installed on the interior walls or ceiling of the barn, reflecting heat away during the summer and trapping it inside during the winter.

    • Advantages: Effective for controlling temperature in hot climates, lightweight, and easy to install.
    • Disadvantages: Less effective in very cold climates and may not provide as much overall insulation as other materials.

    Step-by-Step Guide to Insulating Your Metal Pole Barn

    Step-by-Step Guide to Insulating Your Metal Pole Barn

    Follow these steps to properly insulate your metal pole barn and ensure maximum energy efficiency and comfort.

    Step 1: Evaluate Your Barn’s Needs

    Before starting the insulation process, assess the barn’s purpose and the local climate. If you plan to use the barn year-round, you’ll need more insulation than if it’s just for seasonal storage. 

    Consider the level of insulation you need based on whether the space will be used as a workshop, storage, or living area.

    Step 2: Choose the Right Insulation Material

    Based on your needs and budget, select the insulation material that works best for your situation. 

    For example, if you’re in a particularly cold climate, spray foam or fiberglass with a vapor barrier might be ideal. If you want a budget-friendly option and live in a mild climate, fiberglass insulation could be sufficient.

    Step 3: Prepare the Barn

    Start by clearing the interior of the barn and removing any debris. Check for any damage to the walls or roof that may need repairs before installing insulation. 

    If you’re installing fiberglass or foam board, make sure the studs and rafters are in good condition and free of moisture.

    Frequently Asked Questions 

    1. How much does it cost to insulate a metal pole barn?

    The cost of insulating a metal pole barn varies based on the material, size of the barn, and installation method. On average, the cost can range from $1,500 to $6,000 or more, depending on the insulation type.

    2. Can I install insulation in my pole barn myself?

    Yes, many homeowners can install insulation themselves, especially if they are using fiberglass or foam board. However, for spray foam installation, it’s recommended to hire a professional for proper application.

    3. What’s the best insulation for a pole barn in a cold climate?

    In cold climates, spray foam or fiberglass insulation with a vapor barrier is recommended, as they provide better thermal resistance and moisture control.

    Conclusion

    Insulating your metal pole barn is a valuable investment that improves energy efficiency, comfort, and long-term durability. 

    By choosing the right insulation material and following proper installation techniques, you can create a temperature-controlled environment that works for your needs. 

    Whether you’re using your barn as a workshop, storage space, or living area, proper insulation ensures that it remains functional and comfortable year-round.

  • What Is Better a Pole Barn or Metal Building – Comparison

    What Is Better a Pole Barn or Metal Building – Comparison

    Debating between a pole barn and a metal building? Each has its perks, but your best pick depends on your needs and goals. 

    Whether it’s for a workshop, garage, or livestock shelter, this guide breaks down the pros, cons, and key differences to help you choose the right fit for your next build.

    What is better, a pole barn or metal building?

    It depends on your needs! A pole barn is great for low-cost, easy-to-build structures, while a metal building offers better durability, insulation, and protection against harsh weather.

    Key Takeaways

    • Pole barns are often more affordable, quicker to construct, and versatile for various uses.
    • Metal buildings provide durability, low maintenance, and better resistance to the elements.
    • Your choice depends on factors like budget, intended use, and long-term durability.

    What Is a Pole Barn?

    What Is a Pole Barn

    A pole barn is a type of building constructed with wooden posts (poles) buried in the ground or anchored to a concrete foundation. The frame is built around these poles, with horizontal girts and trusses, and the exterior is typically made of wood, metal, or other materials. 

    Pole barns are commonly used for agricultural purposes, but they can also serve as workshops, storage sheds, or even homes in some cases.

    Advantages of Pole Barns

    Cost-Effective: Pole barns are generally cheaper to build than metal buildings, making them an attractive option for those on a budget.

    Quick Construction: Since the poles act as the main structural support, pole barns are faster to construct compared to metal buildings, which require a more intricate framework.

    Versatile Design: Pole barns can be finished in different ways, from wood to metal or even a mix of both. Many owners look for the best metal pole barn siding options to get durability without sacrificing style, giving them more flexibility in the final look.

    Better for Rural Areas: Pole barns are ideal for rural settings where the ground may not be stable enough for traditional foundations, making them a great option for agricultural properties.

    Disadvantages of Pole Barns

    Less Durability: While pole barns are sturdy, they are more susceptible to weather damage, particularly from heavy winds and rain. The wooden posts can also deteriorate over time if not treated properly.

    Maintenance Requirements: Pole barns typically require more maintenance than metal buildings, especially when it comes to checking the wooden poles for rot, pests, and other wear.

    Limited Insulation: Insulating a pole barn can be more challenging, especially if the building is not initially designed for it. This may limit its functionality in colder climates.

    What Is a Metal Building?

    What Is a Metal Building

    A metal building, also known as a steel building, is a structure made primarily of steel or other metals for the frame and exterior walls. 

    Metal buildings are a popular choice for industrial, commercial, and residential projects thanks to their durability and low maintenance needs. Read more on 30×50 pole barn designs to see how these structures can be customized for various applications.

    They are often chosen for their strength and longevity, as well as their ability to withstand extreme weather conditions.

    Advantages of Metal Buildings

    Durability: Metal buildings are built to last. They are resistant to fire, termites, rot, and other common problems associated with wood structures. Metal buildings can withstand harsh weather conditions, including high winds, heavy rain, and even snow.

    Low Maintenance: Unlike wood structures, metal buildings require very little maintenance. They don’t need to be painted regularly, and their frames are less likely to warp, crack, or rot.

    Energy Efficiency: Metal buildings can often be more energy-efficient than pole barns, especially when properly insulated. If you’re wondering can you paint metal pole barn panels, the answer is yes — and those painted steel panels not only improve appearance but can also help reflect heat, keeping the structure cooler in summer and warmer in winter.

    Long-Term Value: Metal buildings are built for the long haul. While the initial investment may be higher, their longevity and low maintenance requirements make them a solid investment in the long run.

    Disadvantages of Metal Buildings

    Higher Initial Cost: Metal buildings are typically more expensive to build than pole barns, both in terms of materials and labour. However, the long-term savings in maintenance and repairs can offset this initial cost.

    Slower Construction: Metal buildings require a more detailed and precise construction process, which can make the building process take longer compared to pole barns.

    Limited Design Flexibility: While metal buildings offer modern designs, they can lack the aesthetic versatility of pole barns. If you’re looking for a more rustic or traditional look, a metal building may not be the ideal choice.

    Key Differences Between Pole Barns and Metal Buildings

    While both pole barns and metal buildings offer unique benefits, understanding their key differences is crucial when making a decision. 

    Here’s a breakdown of the primary factors to consider:

    Cost

    Pole Barns: Generally, it’s more affordable to build thanks to lower material costs and quicker timelines. Choosing pole barn construction with metal trusses makes the process even faster, though it’s worth noting that maintenance expenses can add up over time.

    Metal Buildings: Tend to have a higher upfront cost due to the materials and detailed construction process. But with less maintenance required, the long-term costs are lower.

    Construction Time

    Pole Barns: Faster to build, which makes them a good choice for projects that need to be completed quickly.

    Metal Buildings: Typically take longer to construct due to the need for precise assembly and the use of heavy-duty materials.

    Frequently Asked Questions

    1. Can you insulate a pole barn as well as a metal building?

    Yes. Both can be insulated well, though steel may need special vapor barriers to prevent condensation in cold climates.

    2. Do pole barns need a concrete floor?

    Not always—a slab is optional. Many builders go with gravel or dirt floors to cut costs, but when choosing between steel building or pole barn, it’s worth weighing long-term durability and maintenance too.

    3. Which building adds more value to a property?

    Metal buildings often increase property value more due to longevity and lower maintenance, but a well-finished pole barn can also offer strong resale appeal.

    Conclusion

    Choosing between a pole barn and a metal building ultimately depends on your specific needs and preferences. If you’re looking for a cost-effective solution with quicker construction and a more rustic look, a pole barn may be the right choice for you. 

    On the other hand, if you prioritize durability, low maintenance, and energy efficiency, a metal building is likely the better investment.

    No matter which option you choose, make sure to consider the long-term costs, the climate in your area, and how you plan to use the building. 

    Both pole barns and metal buildings offer unique advantages, and understanding these differences will help you make the best decision for your project.