
Want to make the most of your pole barn? Adding a loft is a smart way to gain extra storage or even create a cozy living or work space.
Whether you’re expanding up for function or comfort, this guide walks you through planning and building a loft that adds serious value and versatility to your barn.
How to build a loft in a pole barn?
To build a loft in a pole barn, start by adding strong beams to support the floor. Install floor joists, lay down plywood, and ensure the loft area is well-ventilated and safe for use.
Key Takeaways
- A loft in a pole barn can provide extra storage or living space.
- Proper planning and structural considerations are crucial for building a safe and durable loft.
- Materials like wood, steel beams, and high-quality flooring should be chosen for durability and stability.
Why Build a Loft in Your Pole Barn?

Before diving into the step-by-step process of building a loft, it’s important to understand the benefits of adding one to your pole barn.
Here are some of the top reasons why a loft is a great addition:
Maximizing Space
A loft helps to utilise the vertical space in your pole barn, providing more room for storage or creating a functional area without expanding the footprint of the building.
Cost-Effective
Compared to building a separate building or expanding the existing structure, adding a loft is often more affordable and quicker to complete.
Versatility
You can use the loft for a variety of purposes, including storage, an office, a living space, or even a place for hobbies or leisure activities.
Step 1: Plan Your Loft Design
The first step in building a loft is planning the design. You need to carefully consider how the loft will function and what its purpose will be.
Here are a few key factors to consider when planning your loft:
Purpose of the Loft
Decide how you will use the loft. Will it be used for storage, an office, or a living area?
When planning your build, the intended purpose will guide decisions like the size of the loft, necessary materials, and whether to include features such as insulation or electrical wiring. Reviewing detailed 30×40 pole barn with loft plans can help ensure you’re considering all the right elements from the start.
Height Considerations
Consider the height of your pole barn and the headroom available for the loft.
A loft should be tall enough to allow for comfortable movement beneath it, as well as sufficient clearance for the loft itself.
You will need to calculate the right height for both the loft and the space below to ensure it is functional and comfortable.
Floor Area
Measure the available floor area where the loft will be built. This will help you determine the size of the loft and ensure that it fits comfortably within the barn—especially if you’re working with a 30x40x12 pole barn kit, where maximizing usable space is essential.
You should also factor in space for support beams and other structural components that will be needed.
Load-Bearing Capacity
Consider the load-bearing capacity of the pole barn.
A loft adds extra weight to the structure, so you’ll need to be sure the barn can handle the load of the loft, furniture, and any stored materials. For design inspiration, you can view 30×40 pole barn with loft plans to see how others have successfully incorporated this feature.
If you’re unsure, it’s a good idea to consult a structural engineer to make sure your barn can handle the additional weight.
Step 2: Gather Materials and Tools
Once you have your design ready, the next step is gathering the right materials and tools. For example, if you’re planning a loft in a 20×20 pole barn, you’ll need to have a solid list of common materials and equipment to get the job done efficiently:
Materials:
- Wood beams (for the loft frame)
- Plywood or OSB boards (for the loft floor)
- Steel supports or brackets (for additional stability)
- Insulation (if needed)
- Screws, nails, or bolts (for fastening the structure)
- Wood for the staircase or ladder (if you plan to install one)
Tools:
- Tape measure
- Circular saw or miter saw
- Drill and drill bits
- Level
- Hammer or nail gun
- Ladder or scaffolding
- Safety gear (gloves, goggles, ear protection)
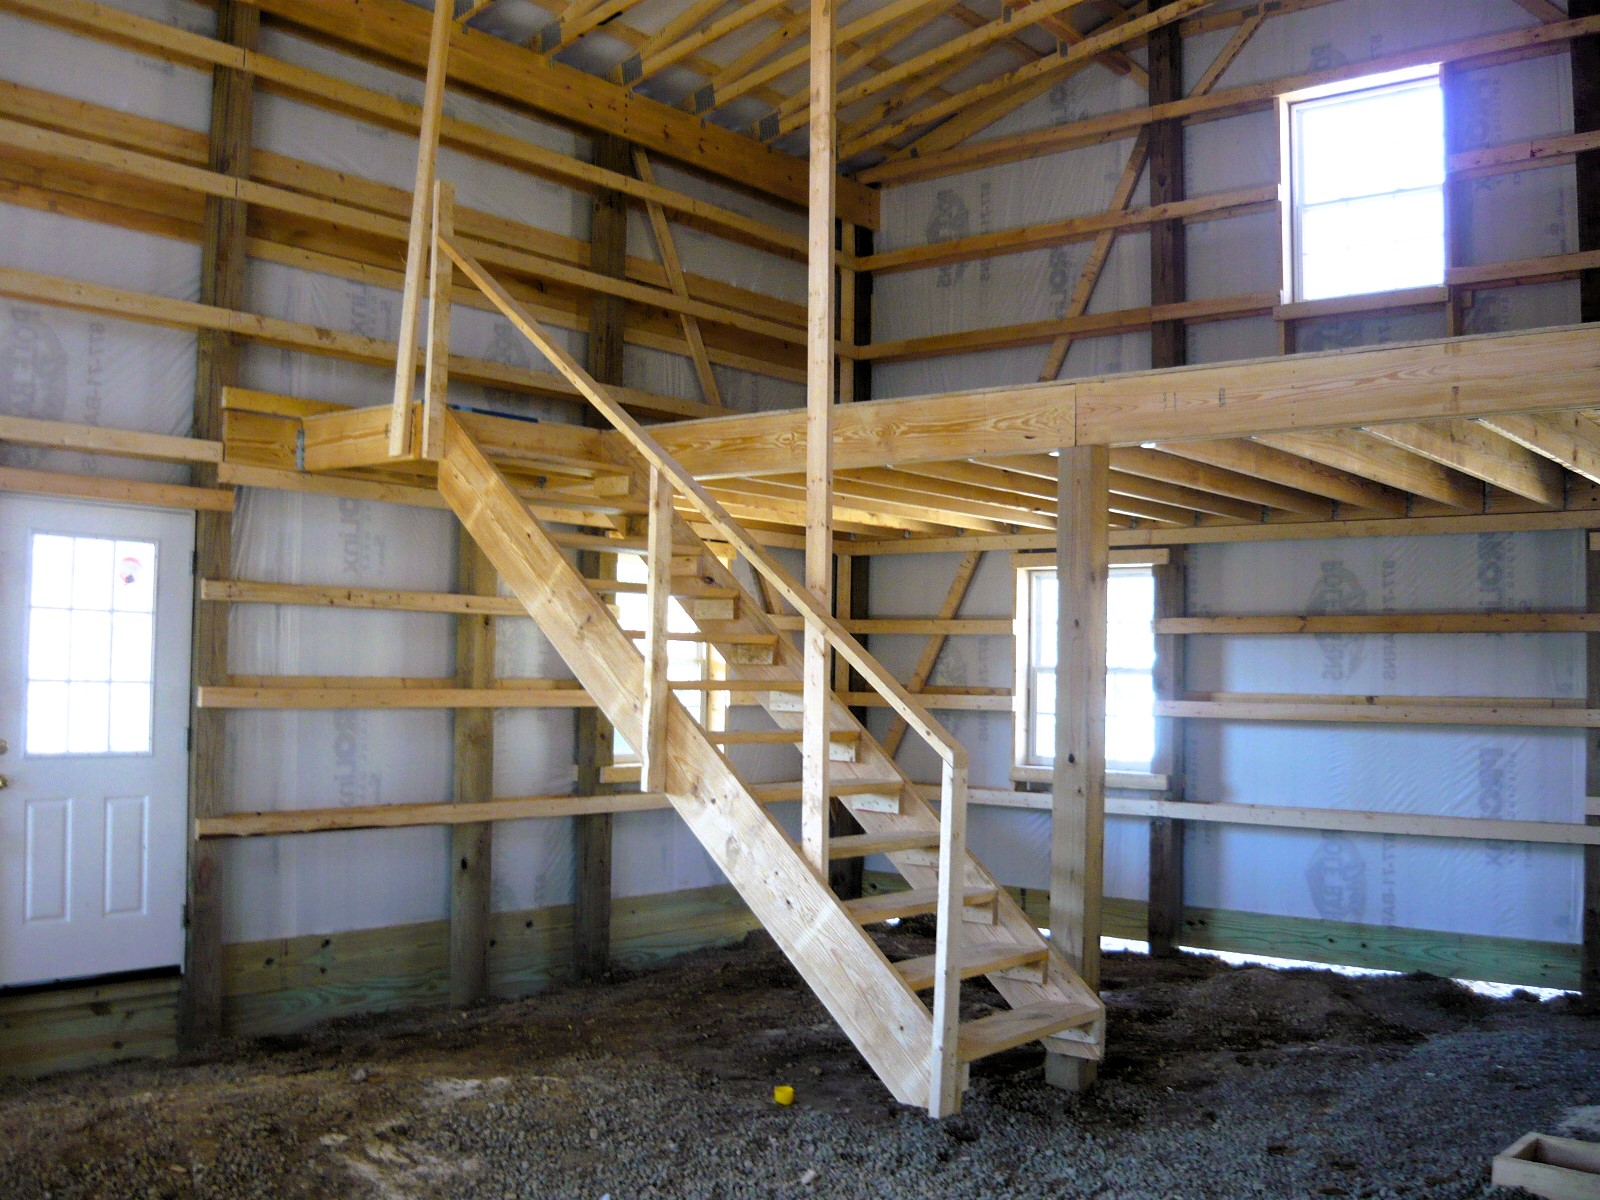
Step 3: Build the Loft Frame

With your materials and tools ready, the next step is to build the loft frame.
This is a critical step because the frame will support the entire structure, so it’s essential that it is sturdy and well-constructed.
Install Support Beams
Begin by installing the support beams that will carry the loft’s weight. Make sure they’re securely anchored to the barn’s frame, just like you would when learning how to add a metal ceiling to a pole barn for extra strength and stability.
You can either attach the beams directly to the walls of the barn or to vertical posts depending on the layout and design. Make sure to use strong, durable beams such as 2x8s or 2x10s.
Place Joists
Next, install the joists that will provide the floor support for the loft. These joists should be spaced evenly apart, typically 16 to 24 inches, depending on the weight they need to support.
Secure the joists to the support beams with screws or nails. Make sure they are level and properly aligned.
Install Brackets or Steel Supports
For added stability, you may want to install brackets or steel supports where the joists meet the beams. This will help prevent shifting and ensure that the loft is secure.
Frequently Asked Questions
1. How much weight can a loft in a pole barn support?
The weight capacity of a loft depends on the materials used and the construction. Typically, a well-built loft can support hundreds of pounds per square foot, but it’s important to consult a professional if you have concerns.
2. Can I build a loft in an existing pole barn?
Yes, a loft can be built in an existing pole barn. However, you may need to reinforce the structure to support the additional weight, depending on the size and type of your pole barn.
3. How long does it take to build a loft in a pole barn?
The time required to build a loft depends on the complexity of the design, your skill level, and the materials used. On average, it may take anywhere from a few days to a few weeks to complete the project.
Conclusion
Building a loft in a pole barn is a great way to maximize your available space and create a functional, multi-purpose area.
With careful planning, the right materials, and proper construction techniques, you can build a loft that provides valuable storage or additional living space for years to come.
Whether you’re looking for extra storage or a cosy retreat, following these steps will help you create a loft that meets your needs and fits your space.