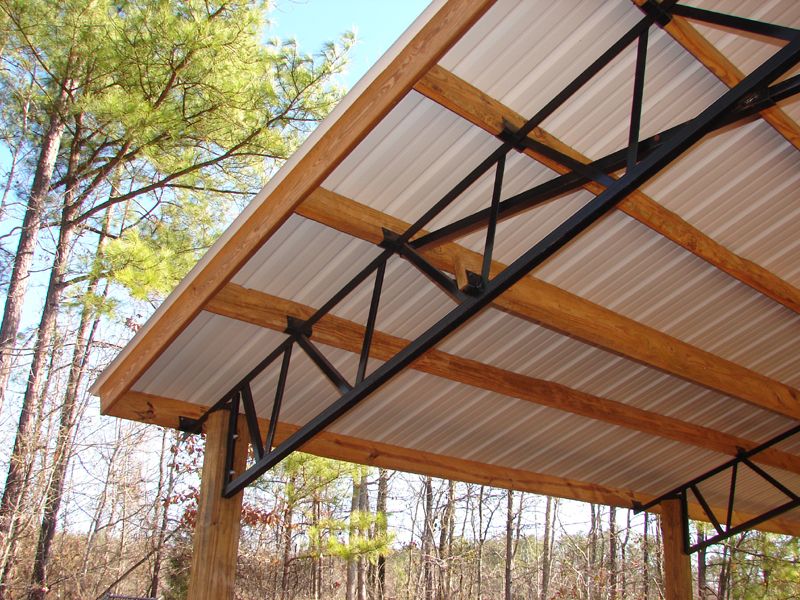
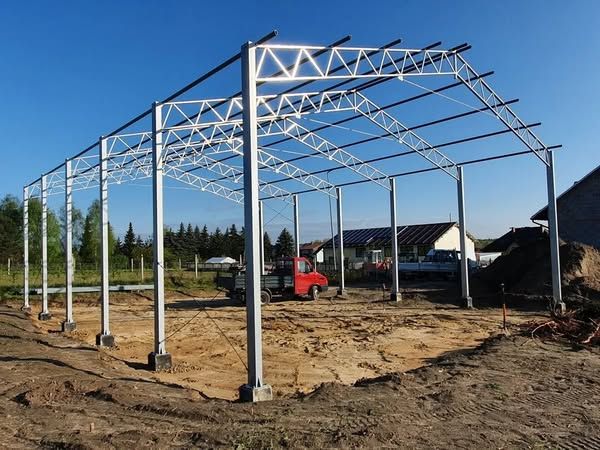
Building a pole barn is simpler than most people think, especially with metal trusses. They reduce labour, increase durability, and lower lifetime costs. This guide walks you through each step to build a sturdy, practical barn that lasts.
How to Build a Pole Barn with Metal Trusses?
Mark out the site, set treated posts to code, fit engineered trusses, add purlins and wall girts, then install roof and wall panels, frame openings, seal trims, and inspect.
Key Takeaways
Metal trusses deliver strength, speed, and clean spans. Plan carefully, use quality materials, and build to code for a barn that lasts decades with minimal maintenance.
Why Choose Metal Trusses for Your Pole Barn?

Built to Last
Properly engineered, galvanised metal trusses do not sag, rot, or invite termites. They resist wind and weather, hold their shape, and keep your barn standing for decades.
Cost That Makes Sense
Steel can cost more upfront, yet whole-life costs are lower. Less maintenance, fewer repairs, and faster builds usually offset the initial spend.
More Space, Less Hassle
Metal trusses can clear-span wide bays, creating open interiors. Fewer posts mean easier movement, storage, and layout options.
Style Meets Strength
Metal delivers a clean, modern look without sacrificing strength. Sleek lines, tough performance.
Planning Your Pole Barn Project
Know Your Purpose
Decide what the barn is for: storage, workshop, animals, or a social space. Purpose drives size, layout, doors, and utilities.
Pick the Right Spot
Choose a level, well-drained site with good access and turning space. Consider utilities, setbacks, and future expansion.
Set a Real Budget
Create a realistic budget that covers trusses, posts, panels, concrete, slab, doors, insulation, labour, equipment hire, and permits. Don’t forget to keep a contingency, especially if you plan to install metal roofing on pole barn structures.
Check Local Rules
Check zoning, setbacks, and permit requirements early. Confirm snow, wind, and seismic loads and any inspections required.
Materials & Tools You’ll Need
Metal Trusses
The structural core. Use engineer-stamped trusses sized for local loads and corrosion protection.
Posts and Lumber
Use UC4B/UC4C ground-contact treated posts and quality framing timber for doors and walls. Straight, dry stock makes assembly faster.
Roofing & Siding Panels
Steel panels are the go-to choice for most builds. When planning, consider gauge, profile, galvanised or painted finish, and trims. For a step-by-step guide to install metal roofing on pole barn, following the right specs ensures both durability and appearance.
Tools of the Trade
Post-hole auger, level, laser or string lines, drill/impact driver, saw, tin snips, and ladders or mobile scaffolds. Consider a telehandler for truss lifts.
Fasteners & Hardware
Use structural bolts, post caps/seat brackets, self-drilling roofing screws with sealing washers, hurricane ties, closure strips, and butyl sealant.
Step-by-Step Guide to Building a Pole Barn with Metal Trusses
Step 1: Mark Your Layout
Set stakes and string lines to the plan dimensions. Check square using diagonals. Confirm setbacks, access, and drainage before digging.
Step 2: Set the Posts
Auger holes to code depth below frost line. Place treated posts with uplift protection and concrete backfill or use pier brackets. Plumb and brace each post.
Step 3: Attach the Skirt Board
Fix a treated grade or splash board along the base to lift panels off the ground and protect from splash-back. Keep it level for straight panels.
Step 4: Place the Metal Trusses
Lift trusses with proper equipment and fix to posts using approved brackets and through-bolts. Brace temporarily and verify spacing and bearing per the drawings.
Step 5: Secure Purlins and Girts
Install roof purlins perpendicular to truss top chords to the specified spacing. Fix wall girts horizontally between posts. Use structural screws or nails as specified.
Step 6: Install the Roof Panels
Fit underlayment or anti-condensation lining if specified. Lay panels from the leeward eave, maintain overlap per the profile, and fasten to purlins without over-driving screws. Use foam closures at eaves and ridge.
Step 7: Add the Wall Panels
Chalk a baseline on the splash board and keep panels plumb as you fix to girts. Use butyl tape at side laps if required and install corner trims as you go.
Step 8: Frame the Openings
Build framed openings to plan before panel install where possible. Add headers, jambs, and lintel support to carry loads and protect panel edges.
Step 9: Install Doors and Windows
Install door tracks, rollers, and hardware, then hang doors and fit windows to manufacturer instructions. Seal perimeters and check smooth operation.
Step 10: Final Touches
Fit ridge, eave, gable, and base trims with closures and sealant. Add gutters, downpipes, ventilation, and any internal lining. Complete final fixings and clean swarf to prevent rust
Cost Considerations
Materials
Metal trusses, steel panels, treated posts, concrete, and trims drive the materials bill. Spec choices such as panel gauge, coatings, and door type change costs quickly
Labour
DIY saves money but extends timelines. Experienced crews reduce errors and rework. Equipment hire for lifts may be cheaper than extra labour.
Extras
Budget for insulation, slab or footings, electrical, lighting, ventilation, drainage, and site works. Keep a contingency for price swings and surprises.
Common Mistakes to Avoid
Skipping the Plan
Build from a scaled plan with dimensions and load data. Accurate drawings prevent misaligned posts, uneven bays, and costly rework..
Wrong Post Spacing
Follow engineered spacing for posts and trusses. Incorrect spacing can overload members and void warranties.
Ignoring Weather Loads
Design for local wind, snow, and seismic loads. Use truss and connection ratings that meet or exceed code.
Cheap Fasteners
Use rated fasteners and connectors. Cheap or mismatched hardware corrodes, loosens, and compromises strength.
Skipping Level Checks
Check level, plumb, and alignment at every stage. Small errors compound into structural and aesthetic problems.
Safety Tips When Working with Metal Trusses
Gear Up Smart: Wear gloves, safety boots, eye and hearing protection, and a hard hat. Metal edges are sharp, so handle panels and trusses with care.
Watch the Weight: Use mechanical lifts or a certified crew for truss handling. Never exceed rated capacities or work under suspended loads.
Lock It Down: Brace trusses and secure temporary supports until permanent bracing is installed. Use fall protection when working at height.
Final Thoughts
Building a pole barn with metal trusses is achievable with good planning and safe practice. Use engineered components, follow the drawings, and keep quality checks frequent. Do that, and you will own a barn that looks sharp and lasts.

